Trying to Authenticate in a Demo Application using OpenID Connect (OIDC) using Keycloak

I like learning new stuff - anything, including technology. I love tinkering with new tools, systems and services, especially open source projects
I was trying out Keycloak as part of evaluating OpenID Connect providers for Vault and any other applications we will host at my company
In this post, let's look at how I tried out Keycloak OpenID Connect login in my local along with an example demo app from dex repository - https://github.com/dexidp/dex/tree/daf1bf256486ada5d7a70f3dbf6bcd7f55622284/examples/example-app
First, let's run Keycloak using Docker using a Keycloak container image, all in local
Before running Keycloak using Docker, let me show you the version information ℹ️
$ docker run --rm keycloak/keycloak --version
Keycloak 23.0.5
JVM: 17.0.10 (Red Hat, Inc. OpenJDK 64-Bit Server VM 17.0.10+7-LTS)
OS: Linux 6.5.11-linuxkit amd64
Here, we are using the Keycloak container image from Docker Hub - https://hub.docker.com/r/keycloak/keycloak and the version I'm using is the latest version as of this writing ✍️ , which is 23.0.5 - https://github.com/keycloak/keycloak/releases/tag/23.0.5
I use no image tags while running the container image, so the default image tag of latest is taken up and latest container image is picked up. You can also run using the 23.0.5 image tag, like this -
$ docker run --rm keycloak/keycloak:23.0.5 --version
It will look something like this -
$ docker run --rm keycloak/keycloak:23.0.5 --version
Unable to find image 'keycloak/keycloak:23.0.5' locally
23.0.5: Pulling from keycloak/keycloak
Digest: sha256:8772ab5e763f3374b7bb70bce4a96ad384b39c548c40007113538e103ee8a8f2
Status: Downloaded newer image for keycloak/keycloak:23.0.5
Keycloak 23.0.5
JVM: 17.0.10 (Red Hat, Inc. OpenJDK 64-Bit Server VM 17.0.10+7-LTS)
OS: Linux 6.5.11-linuxkit amd64
Also, you can run with the help flag to see all the flags and options you have -
$ docker run --rm keycloak/keycloak:23.0.5 --help
It will look something like this -
$ docker run --rm keycloak/keycloak:23.0.5 --help
Keycloak - Open Source Identity and Access Management

Find more information at: https://www.keycloak.org/docs/latest

Usage:

kc.sh [OPTIONS] [COMMAND]

Use this command-line tool to manage your Keycloak cluster.

Options:

-cf, --config-file <file>
                     Set the path to a configuration file. By default, configuration properties are
                       read from the "keycloak.conf" file in the "conf" directory.
-h, --help           This help message.
-v, --verbose        Print out error details when running this command.
-V, --version        Show version information

Commands:

  build                   Creates a new and optimized server image.
  start                   Start the server.
  start-dev               Start the server in development mode.
  export                  Export data from realms to a file or directory.
  import                  Import data from a directory or a file.
  show-config             Print out the current configuration.
  tools                   Utilities for use and interaction with the server.
    completion            Generate bash/zsh completion script for kc.sh.

Examples:

  Start the server in development mode for local development or testing:

      $ kc.sh start-dev

  Building an optimized server runtime:

      $ kc.sh build <OPTIONS>

  Start the server in production mode:

      $ kc.sh start <OPTIONS>

  Enable auto-completion to bash/zsh:

      $ source <(kc.sh tools completion)

  Please, take a look at the documentation for more details before deploying in
production.

Use "kc.sh start --help" for the available options when starting the server.
Use "kc.sh <command> --help" for more information about other commands.
Now let's run (start) the Keycloak server to see it run and use it
$ docker run --rm -p 8080:8080 -e KEYCLOAK_ADMIN="admin" -e KEYCLOAK_ADMIN_PASSWORD="admin" keycloak/keycloak start-dev
I'm running Keycloak in development mode. Please DO NOT use this configuration in production
When you run the above command, it will look something like this -
$ docker run --rm -p 8080:8080 -e KEYCLOAK_ADMIN="admin" -e KEYCLOAK_ADMIN_PASSWORD="admin" keycloak/keycloak start-dev
Updating the configuration and installing your custom providers, if any. Please wait.
2024-02-01 14:20:42,750 INFO  [io.quarkus.deployment.QuarkusAugmentor] (main) Quarkus augmentation completed in 6640ms
2024-02-01 14:20:44,238 INFO  [org.keycloak.quarkus.runtime.hostname.DefaultHostnameProvider] (main) Hostname settings: Base URL: <unset>, Hostname: <request>, Strict HTTPS: false, Path: <request>, Strict BackChannel: false, Admin URL: <unset>, Admin: <request>, Port: -1, Proxied: false
2024-02-01 14:20:45,906 WARN  [io.quarkus.agroal.runtime.DataSources] (main) Datasource <default> enables XA but transaction recovery is not enabled. Please enable transaction recovery by setting quarkus.transaction-manager.enable-recovery=true, otherwise data may be lost if the application is terminated abruptly
2024-02-01 14:20:46,444 WARN  [org.infinispan.PERSISTENCE] (keycloak-cache-init) ISPN000554: jboss-marshalling is deprecated and planned for removal
2024-02-01 14:20:46,582 WARN  [org.infinispan.CONFIG] (keycloak-cache-init) ISPN000569: Unable to persist Infinispan internal caches as no global state enabled
2024-02-01 14:20:46,683 INFO  [org.infinispan.CONTAINER] (keycloak-cache-init) ISPN000556: Starting user marshaller 'org.infinispan.jboss.marshalling.core.JBossUserMarshaller'
2024-02-01 14:20:47,300 INFO  [org.keycloak.connections.infinispan.DefaultInfinispanConnectionProviderFactory] (main) Node name: node_354000, Site name: null
2024-02-01 14:20:50,550 INFO  [org.keycloak.quarkus.runtime.storage.legacy.liquibase.QuarkusJpaUpdaterProvider] (main) Initializing database schema. Using changelog META-INF/jpa-changelog-master.xml

UPDATE SUMMARY
Run:                        117
Previously run:               0
Filtered out:                 0
-------------------------------
Total change sets:          117

2024-02-01 14:20:55,112 INFO  [org.keycloak.broker.provider.AbstractIdentityProviderMapper] (main) Registering class org.keycloak.broker.provider.mappersync.ConfigSyncEventListener
2024-02-01 14:20:55,153 INFO  [org.keycloak.services] (main) KC-SERVICES0050: Initializing master realm
2024-02-01 14:20:56,830 INFO  [io.quarkus] (main) Keycloak 23.0.5 on JVM (powered by Quarkus 3.2.10.Final) started in 13.965s. Listening on: http://0.0.0.0:8080
2024-02-01 14:20:56,830 INFO  [io.quarkus] (main) Profile dev activated.
2024-02-01 14:20:56,830 INFO  [io.quarkus] (main) Installed features: [agroal, cdi, hibernate-orm, jdbc-h2, jdbc-mariadb, jdbc-mssql, jdbc-mysql, jdbc-oracle, jdbc-postgresql, keycloak, logging-gelf, micrometer, narayana-jta, reactive-routes, resteasy-reactive, resteasy-reactive-jackson, smallrye-context-propagation, smallrye-health, vertx]
2024-02-01 14:20:57,212 INFO  [org.keycloak.services] (main) KC-SERVICES0009: Added user 'admin' to realm 'master'
2024-02-01 14:20:57,216 WARN  [org.keycloak.quarkus.runtime.KeycloakMain] (main) Running the server in development mode. DO NOT use this configuration in production.
Now you can go to http://localhost:8080/ and see the Keycloak page -

Next, you can click on Administration Console and it will go to http://localhost:8080/admin/ and it will look like this -
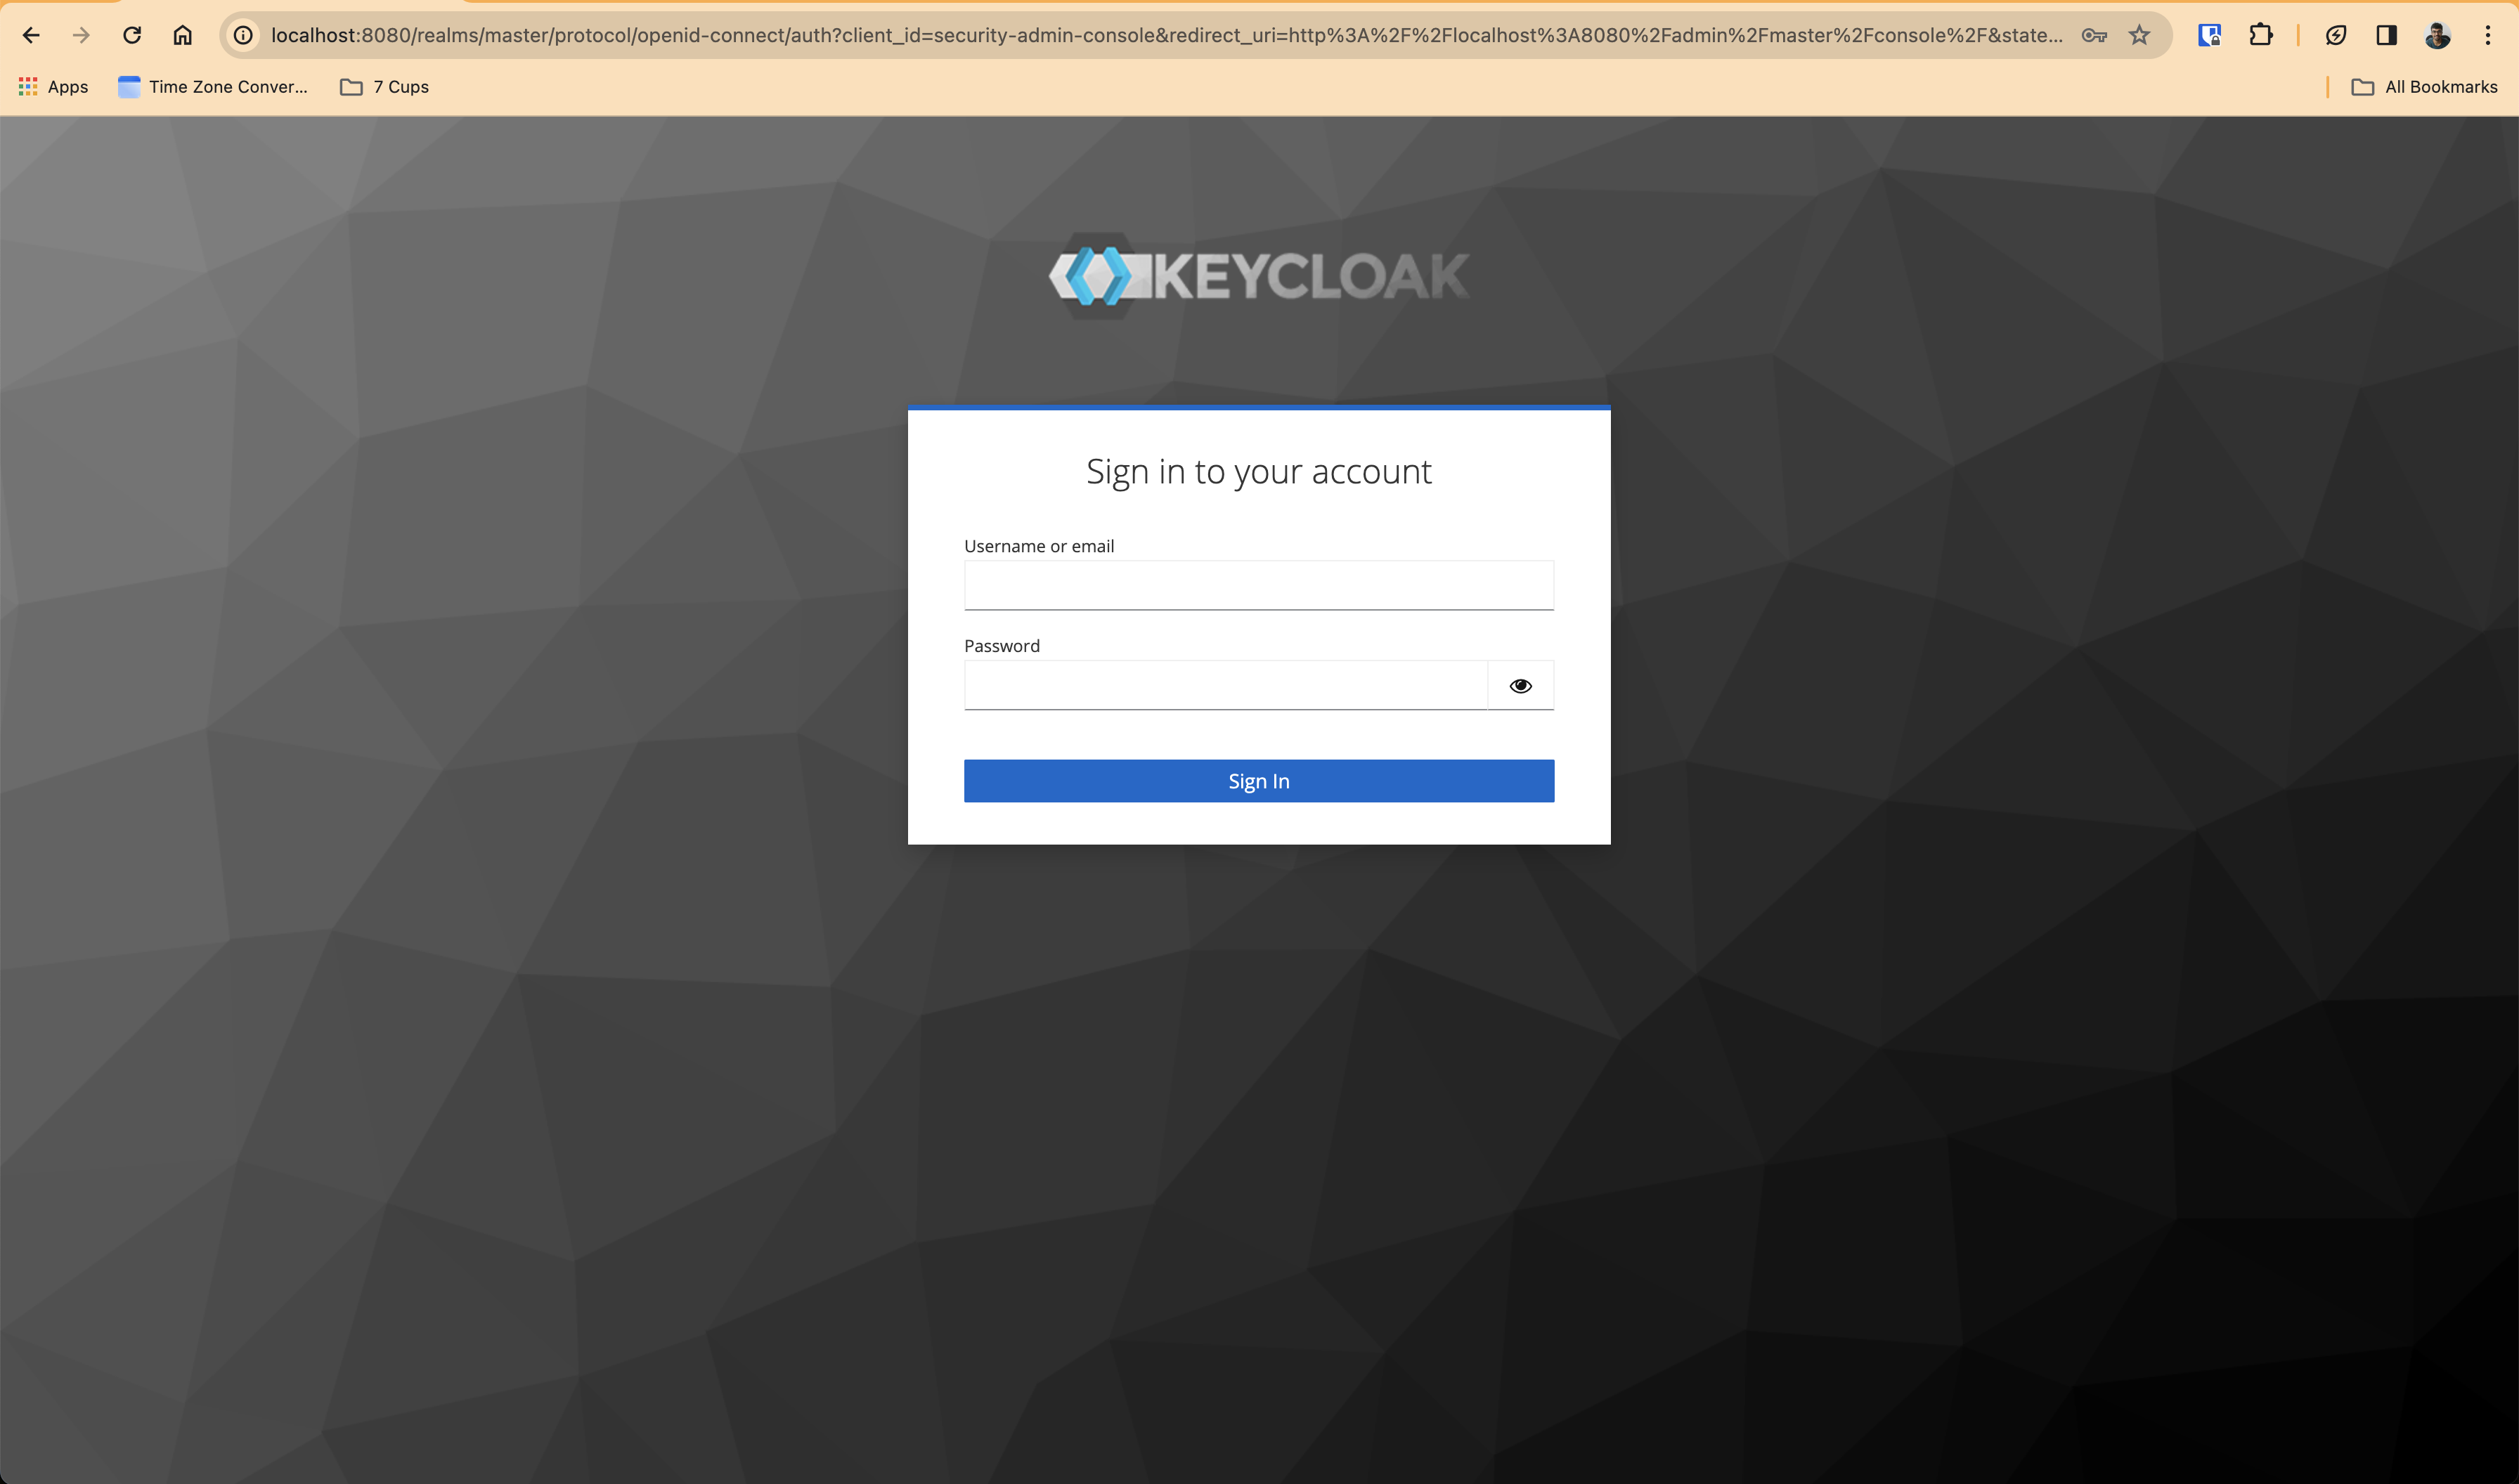
http://localhost:8080/admin/ will redirect to http://localhost:8080/admin/master/console/ and then it will get redirected to a big URL like the one shown in the image, something like this - http://localhost:8080/realms/master/protocol/openid-connect/auth?client_id=security-admin-console&redirect_uri=http%3A%2F%2Flocalhost%3A8080%2Fadmin%2Fmaster%2Fconsole%2F&state=7ead29bc-461d-4745-84f0-ad062b76d9b7&response_mode=fragment&response_type=code&scope=openid&nonce=4addb02c-2c79-47c2-881a-2043edbb6c63&code_challenge=-puynJjEbdexstTP-hw908cORoWAmI70QHQwoxSpQtQ&code_challenge_method=S256
You can use the credentials - Username: admin and Password: admin
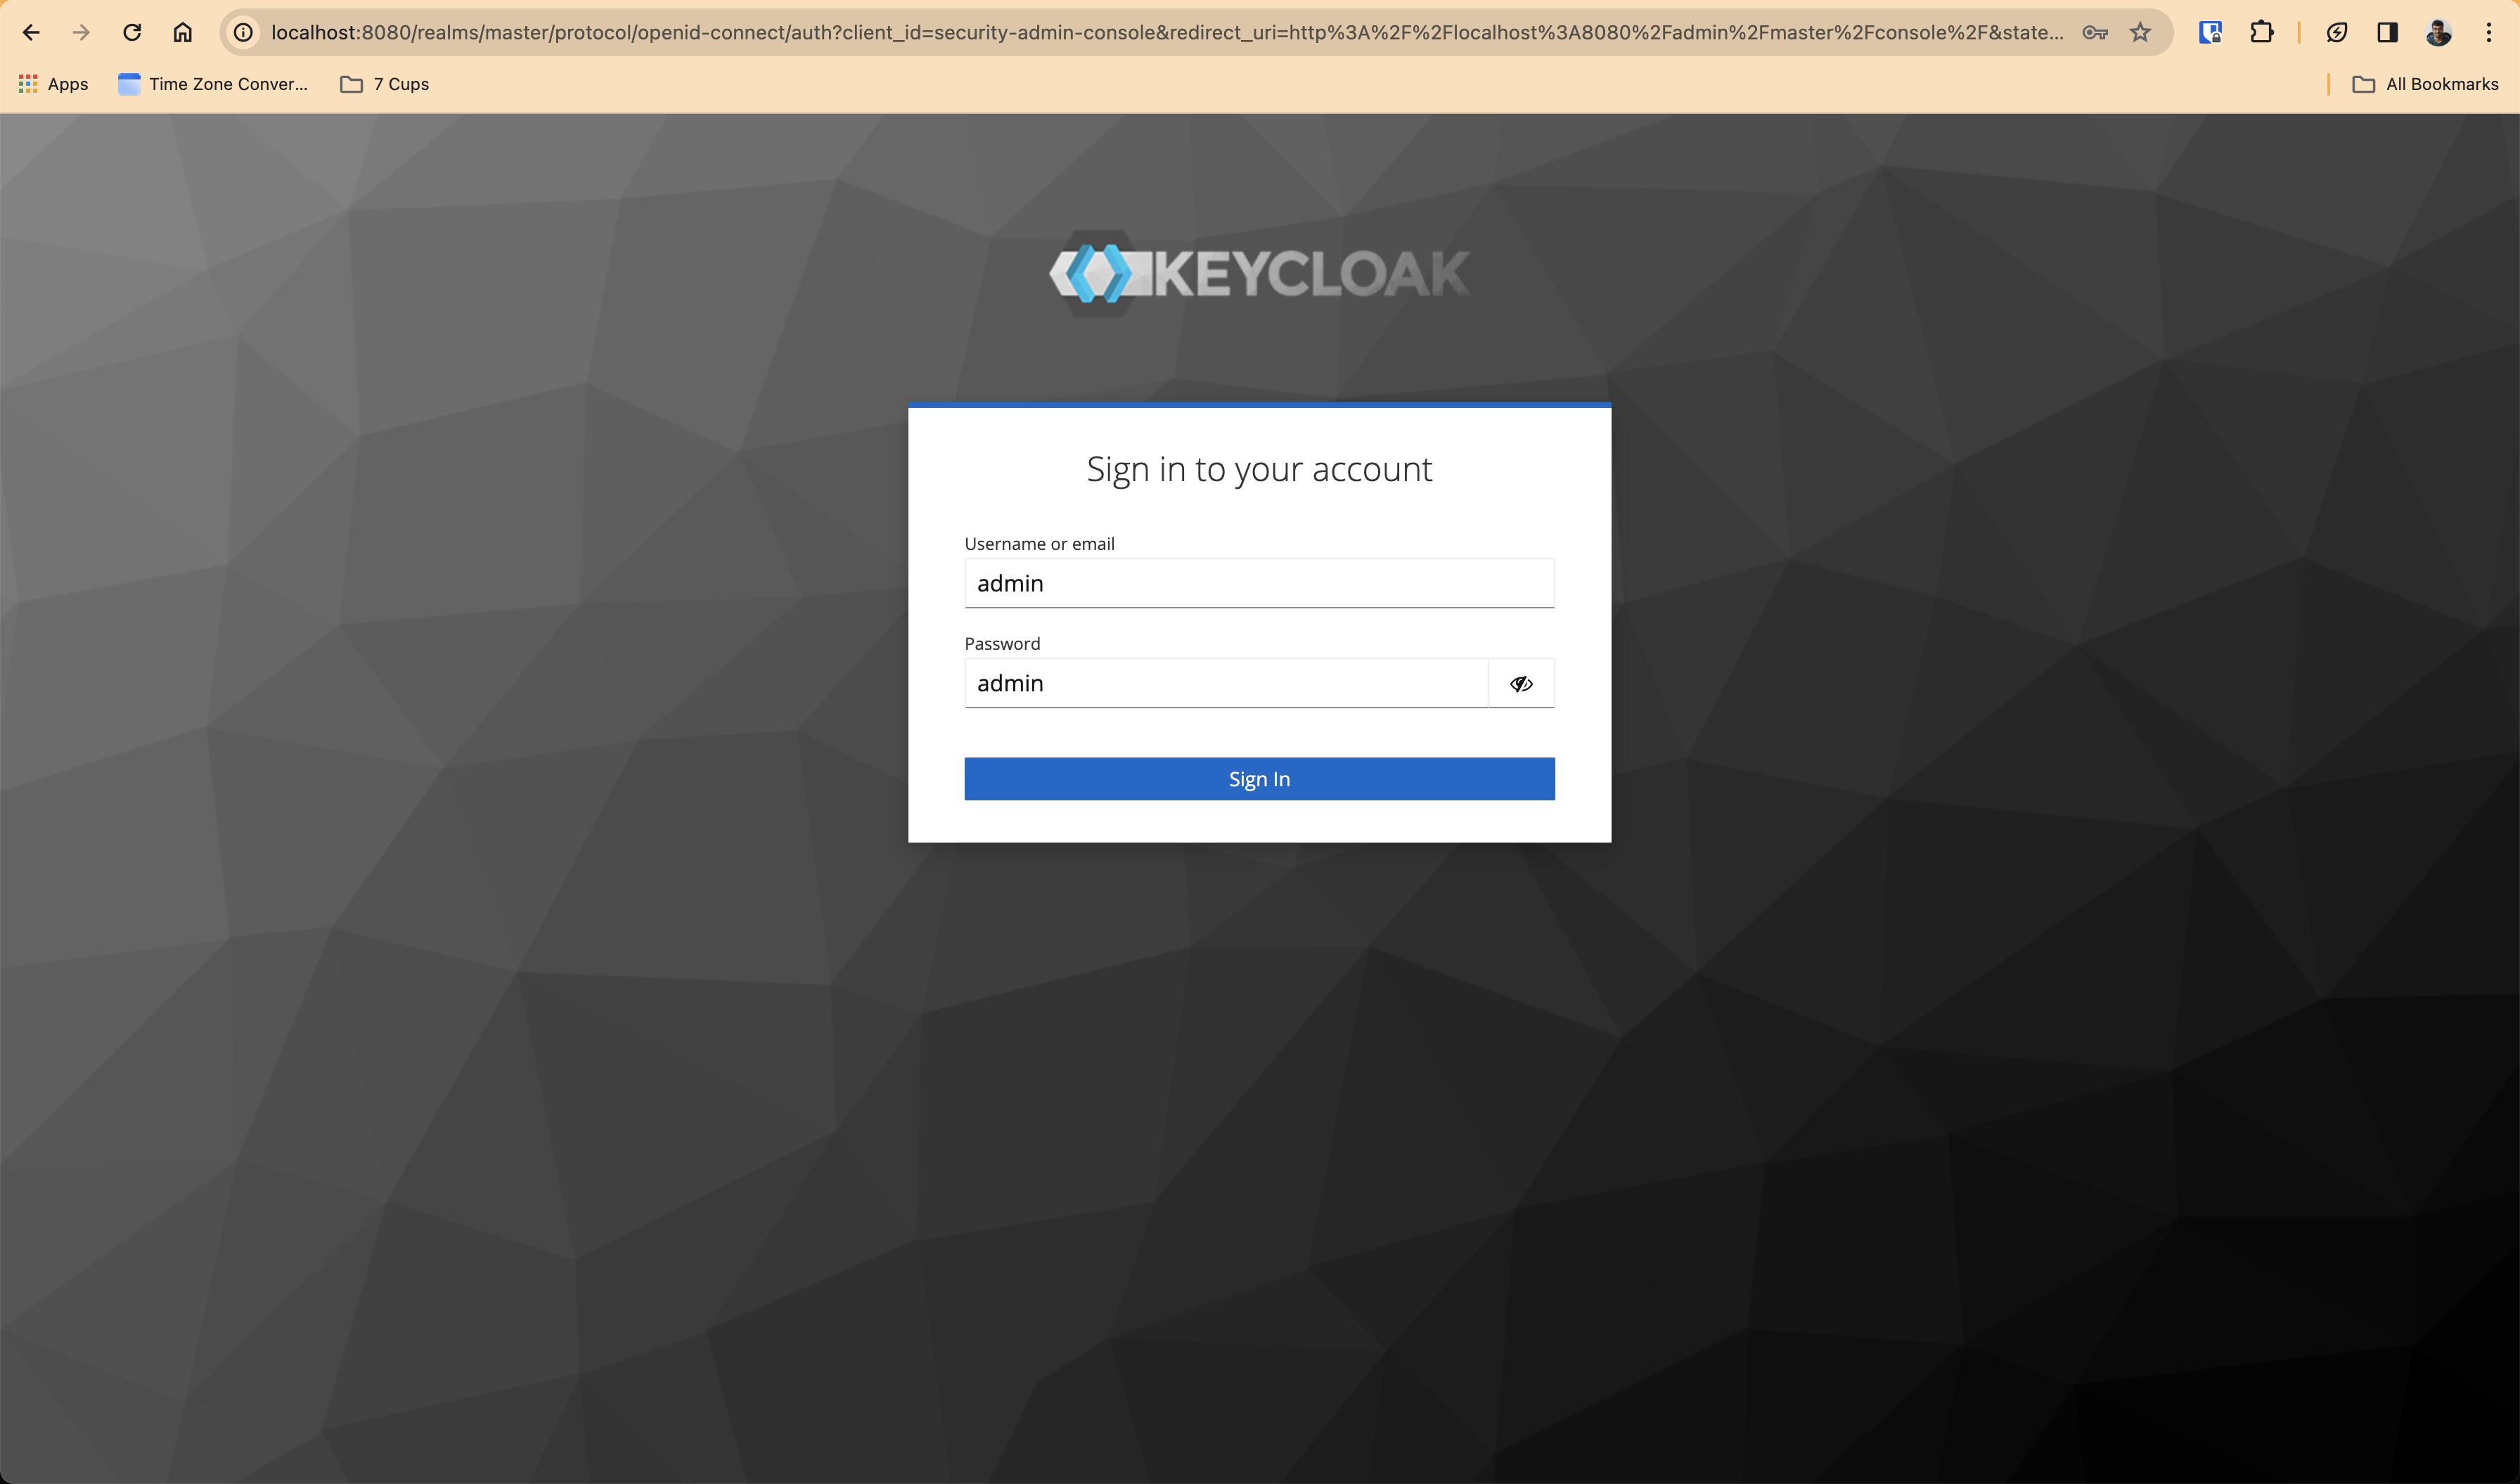
And then, after login, it will look something like this -

Next, create a client in Keycloak for the demo application. A client that we will use to setup the demo application's authentication using Keycloak OpenID Connect
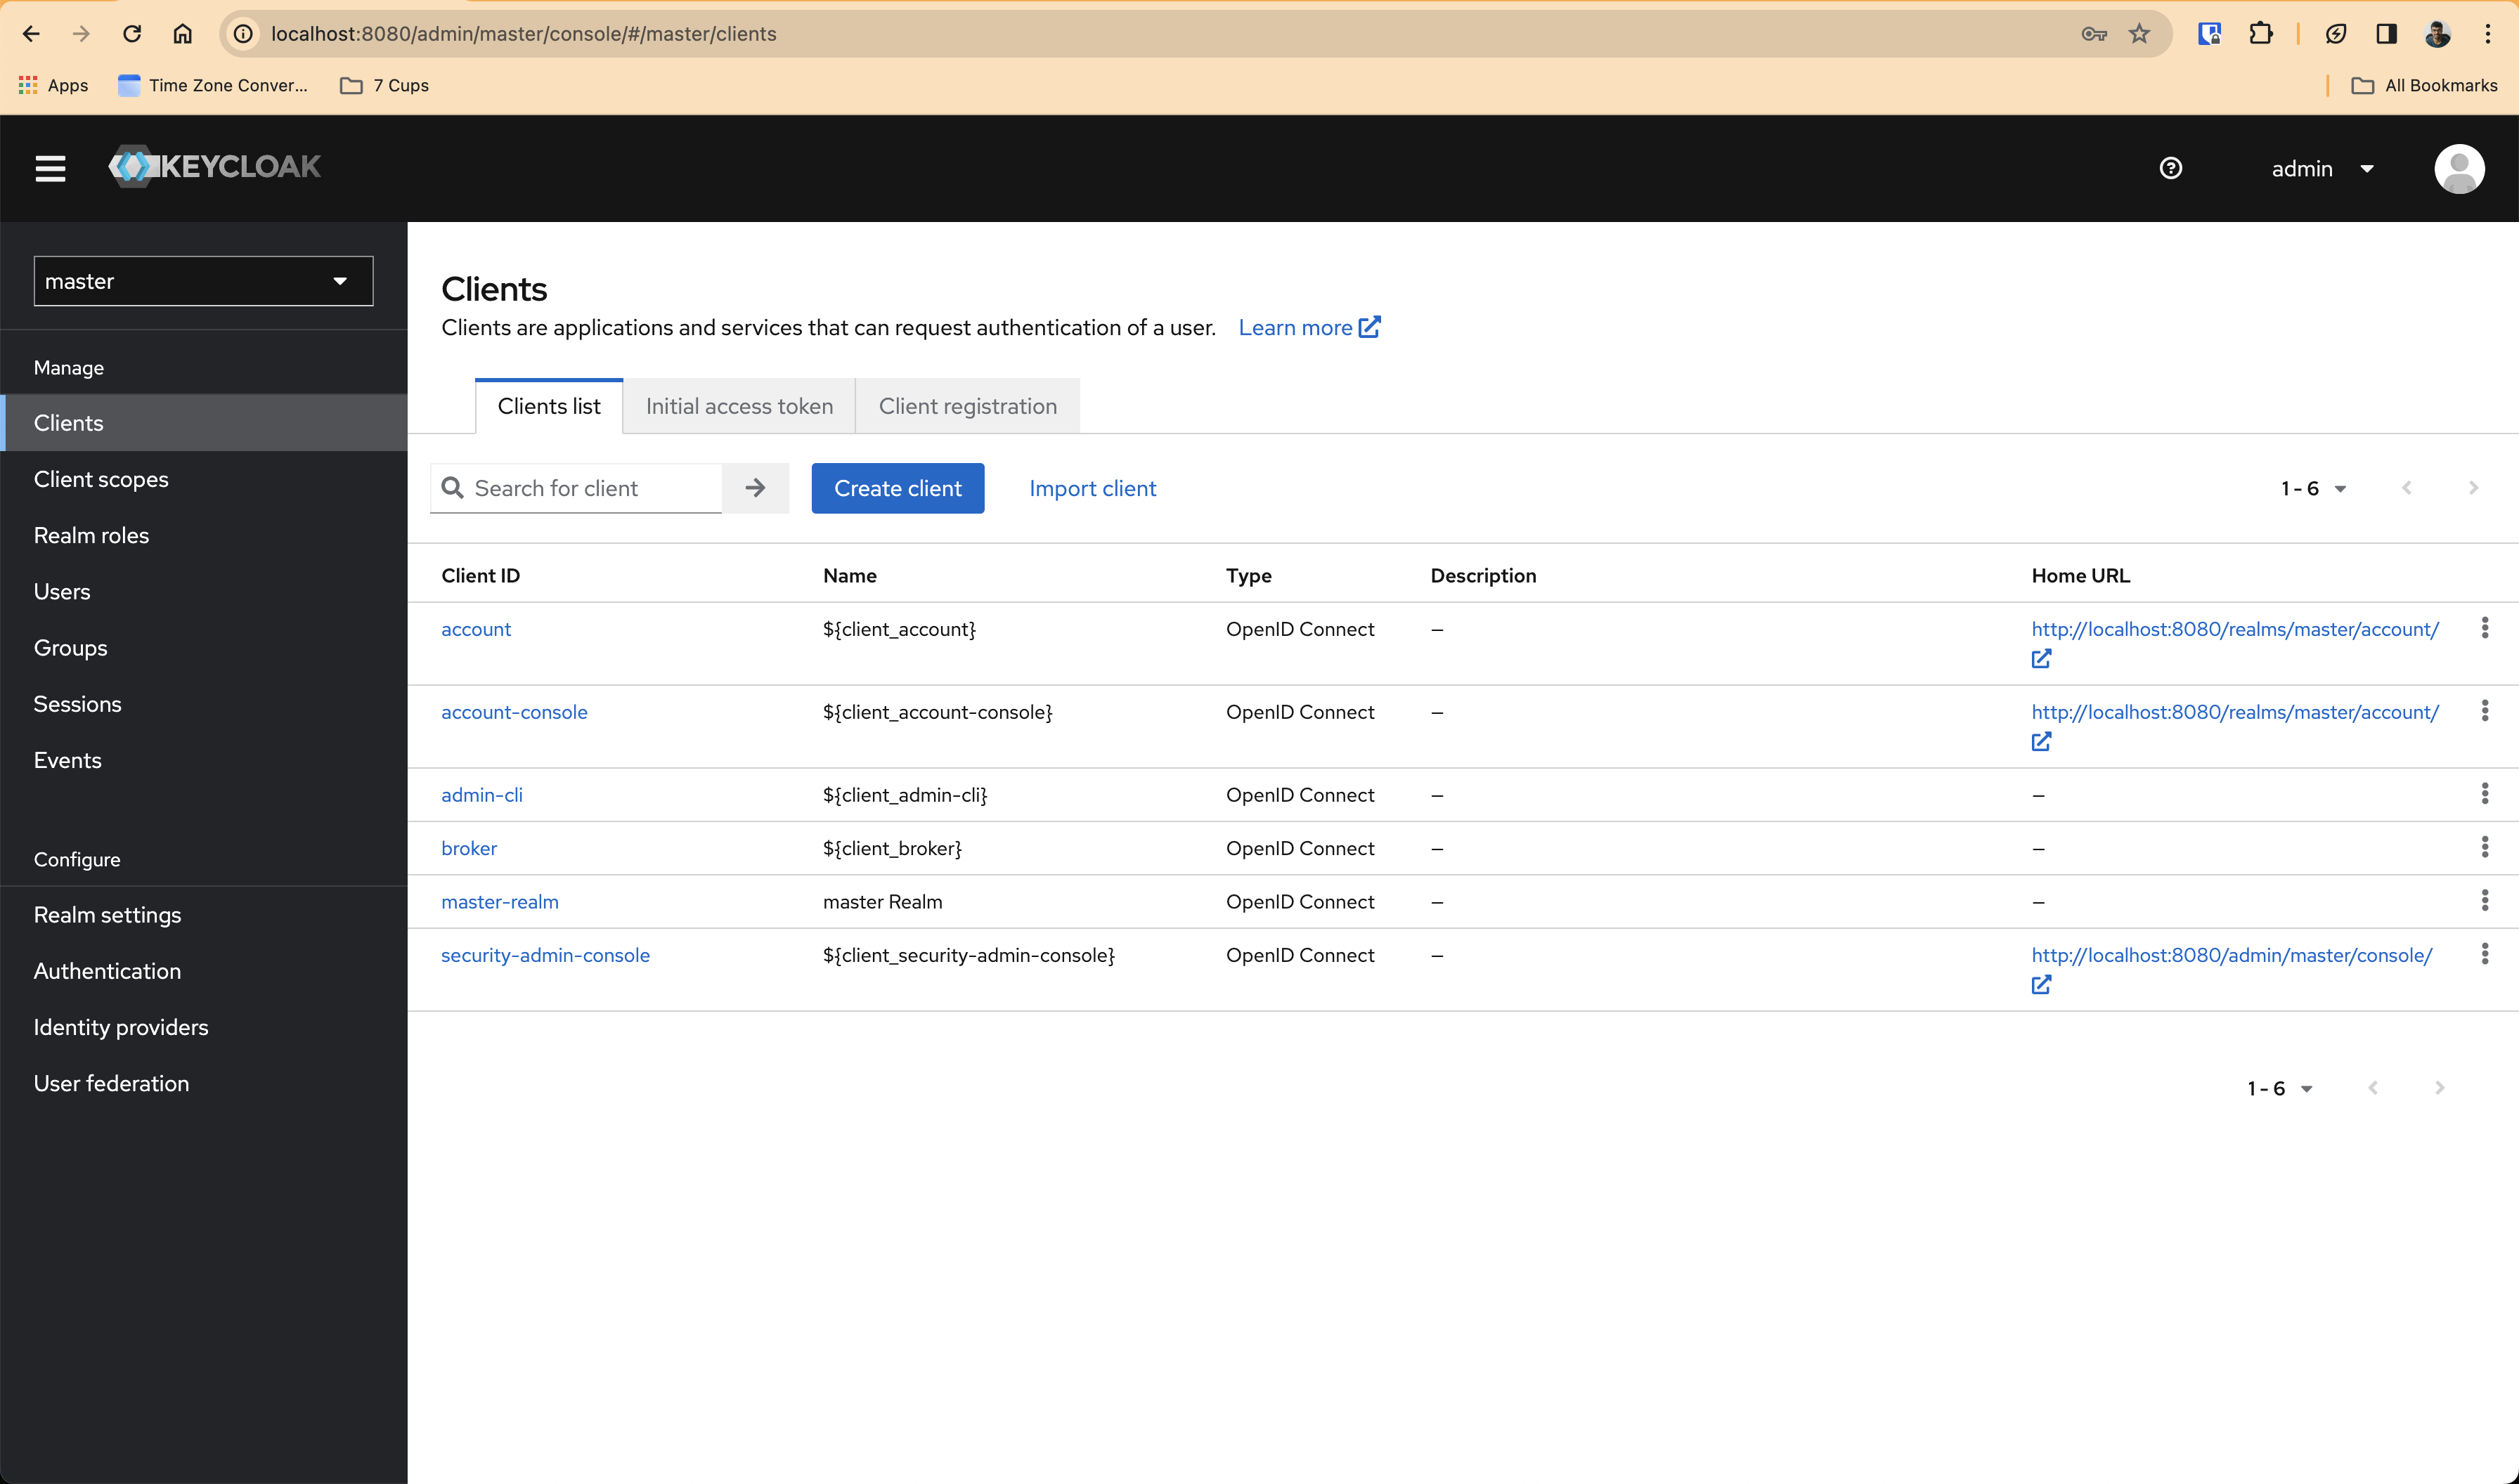
On the left, choose Clients section, and it will go to a page that looks like this -
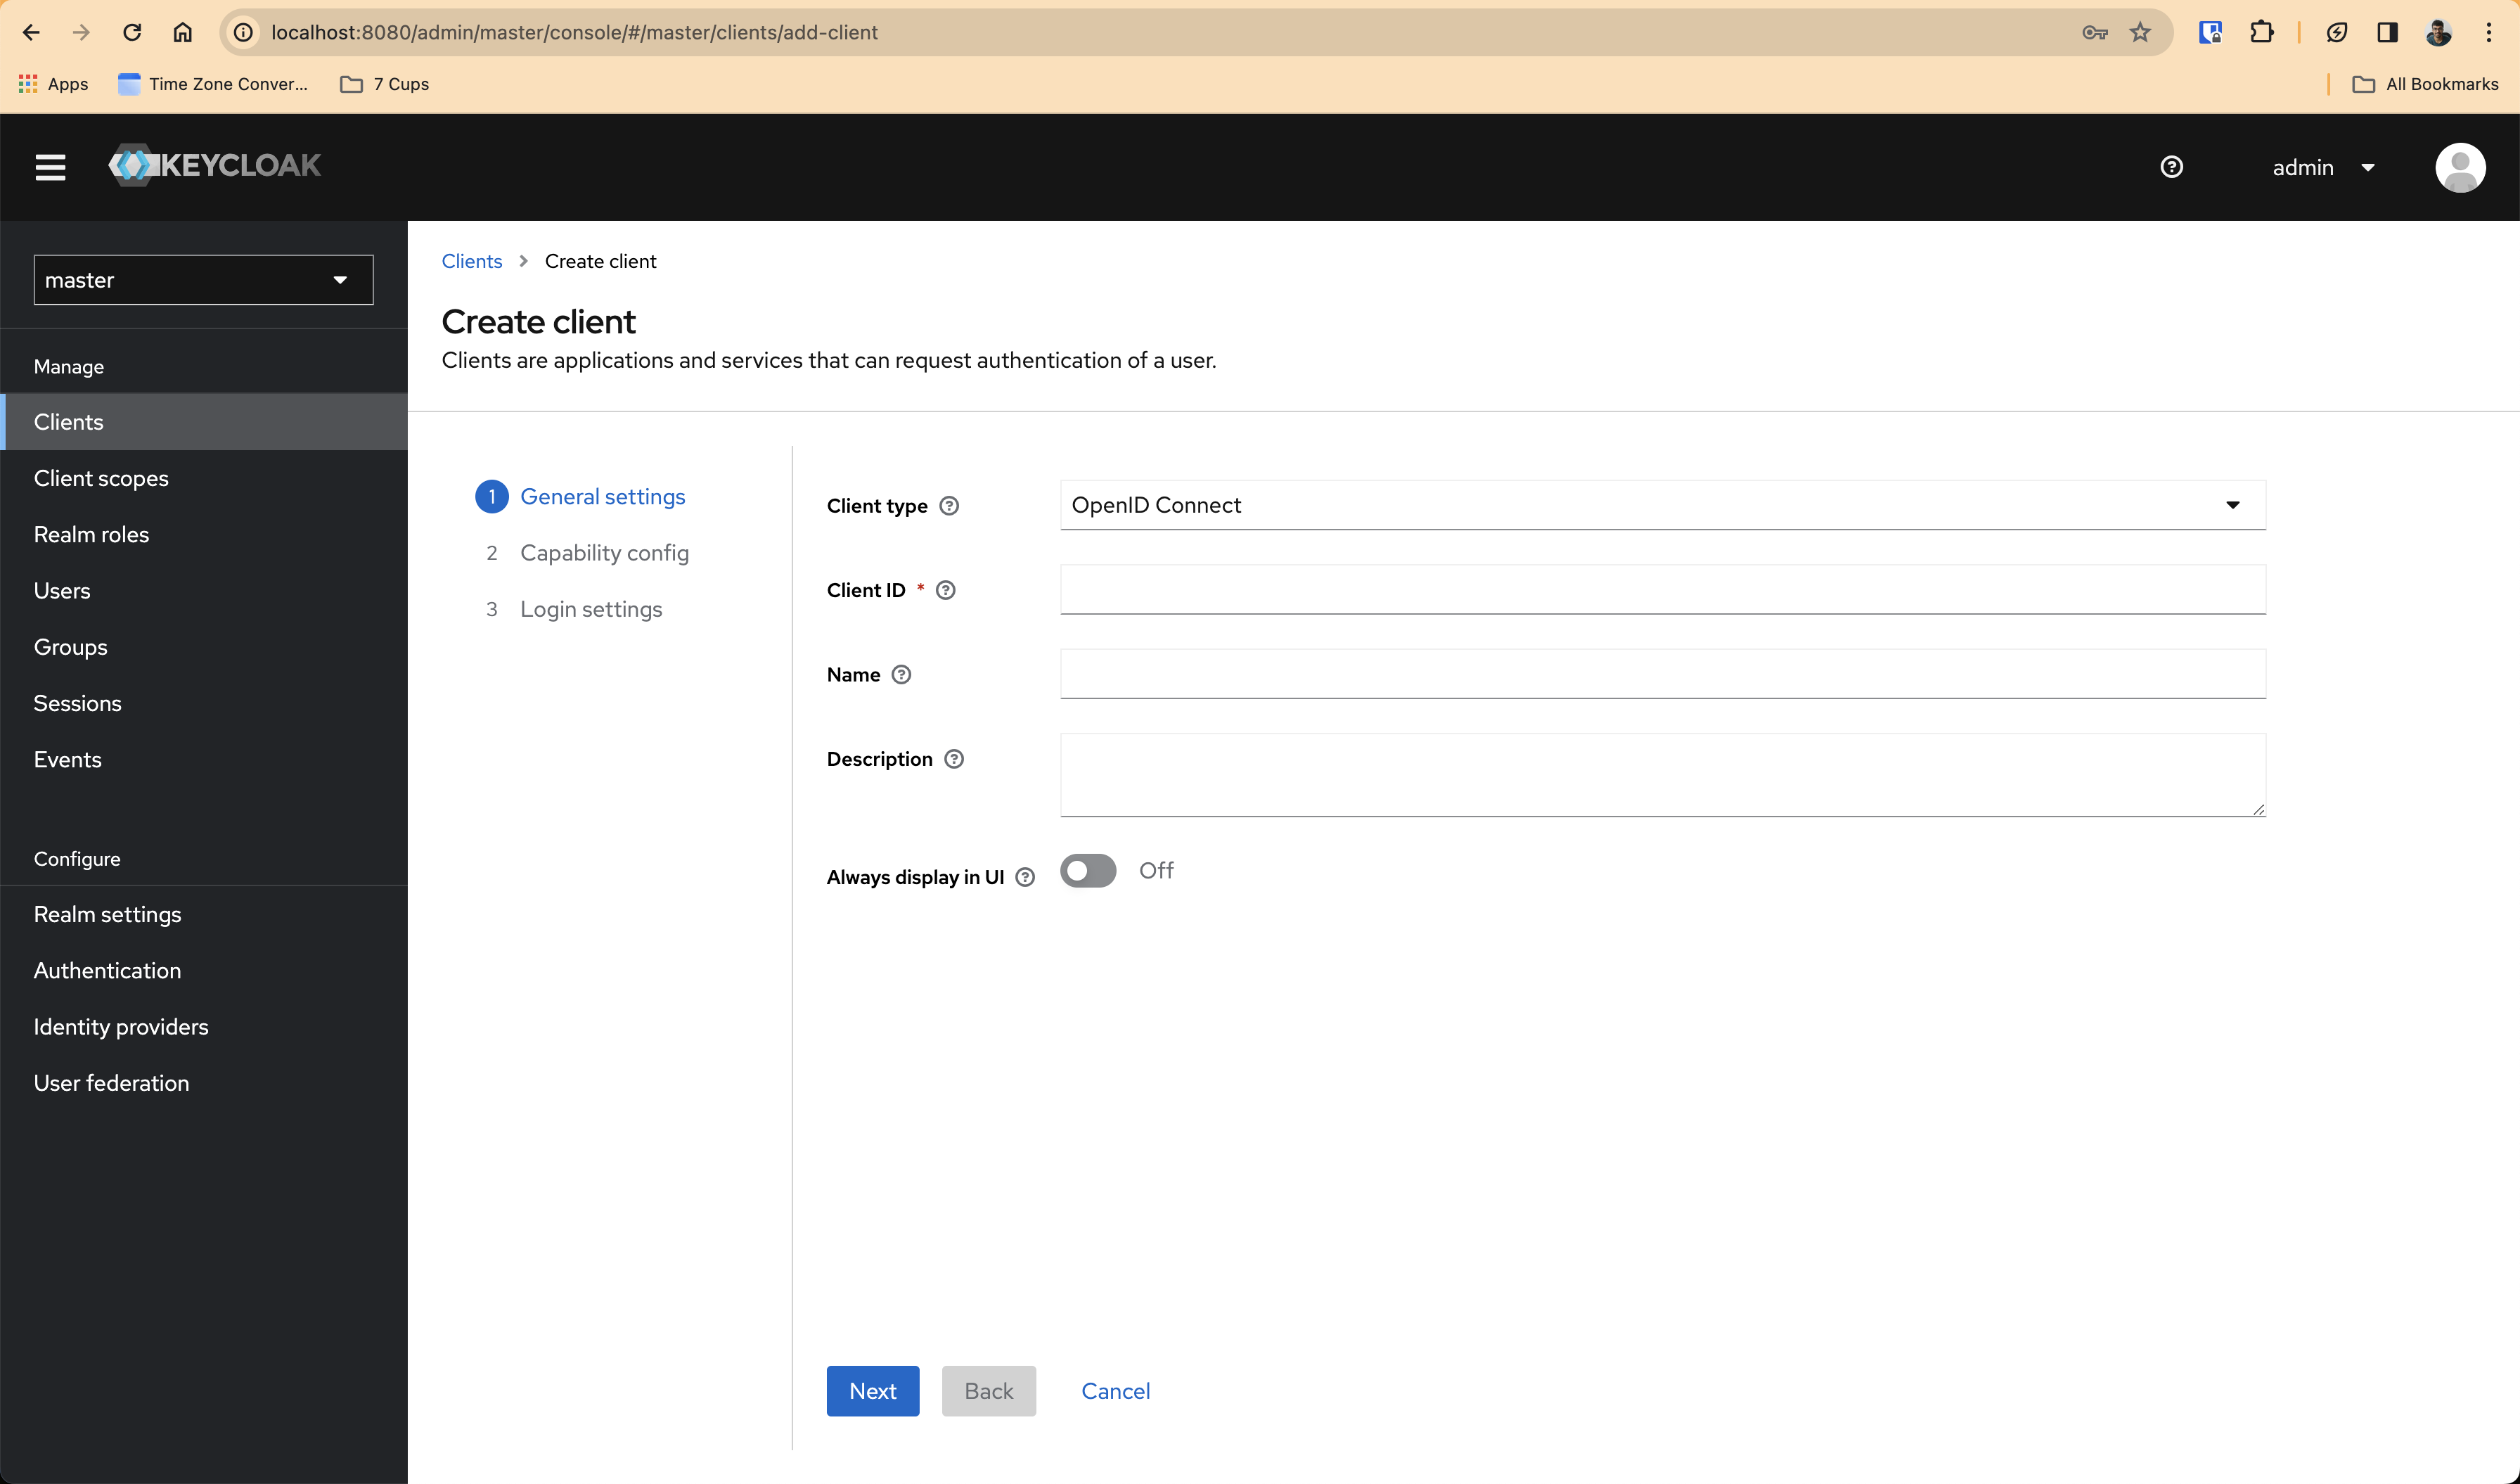
Click Create Client button and it will go to a new page that looks like this -
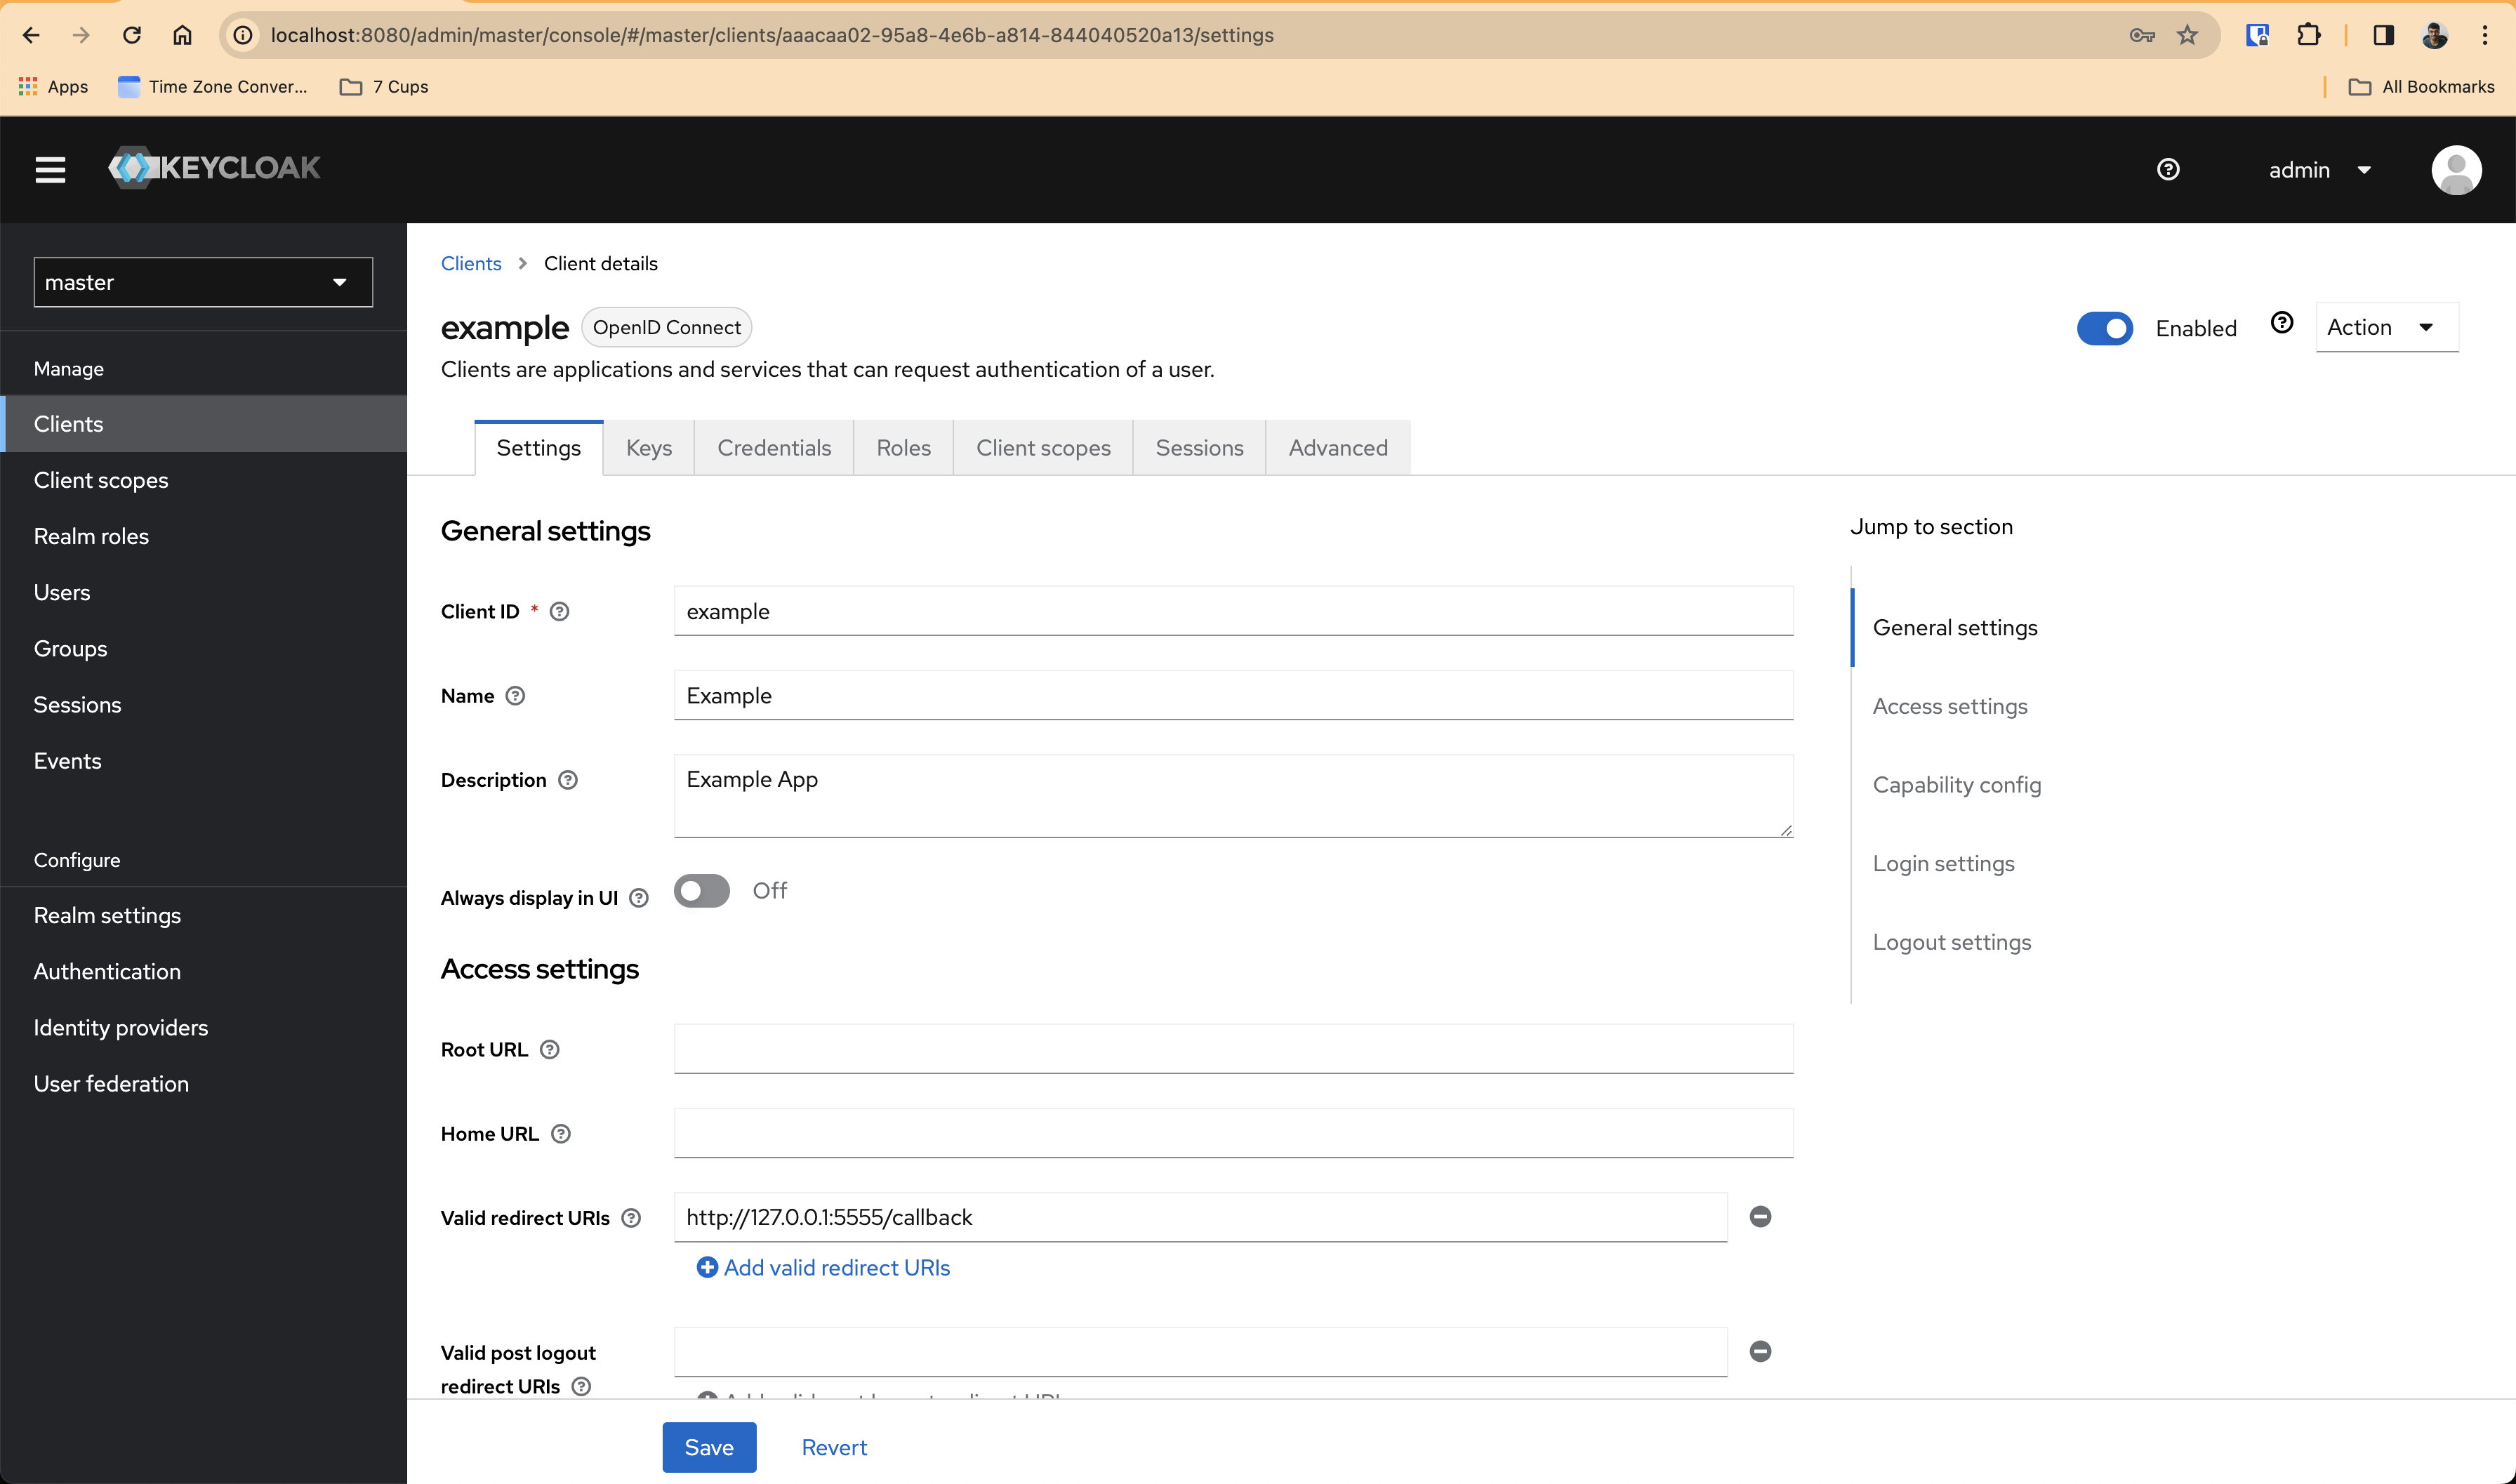
Let's just name the client as Example and give it an ID example and give a sample description like Example App, just for demo purposes. It will look like this -

Next, click on Next and enable Client authentication, we won't do any Authorization stuff for now, so, leave it. We will just enable Standard flow for now in Authentication flow . It will look something like this -

Next, click on Next and put http://127.0.0.1:5555/callback for Valid redirect URIs for now and then click Save . It will look something like this -

After saving, it will look something like this -
Now, go to Credentials section and get the Client secret key value. It will look something like this -
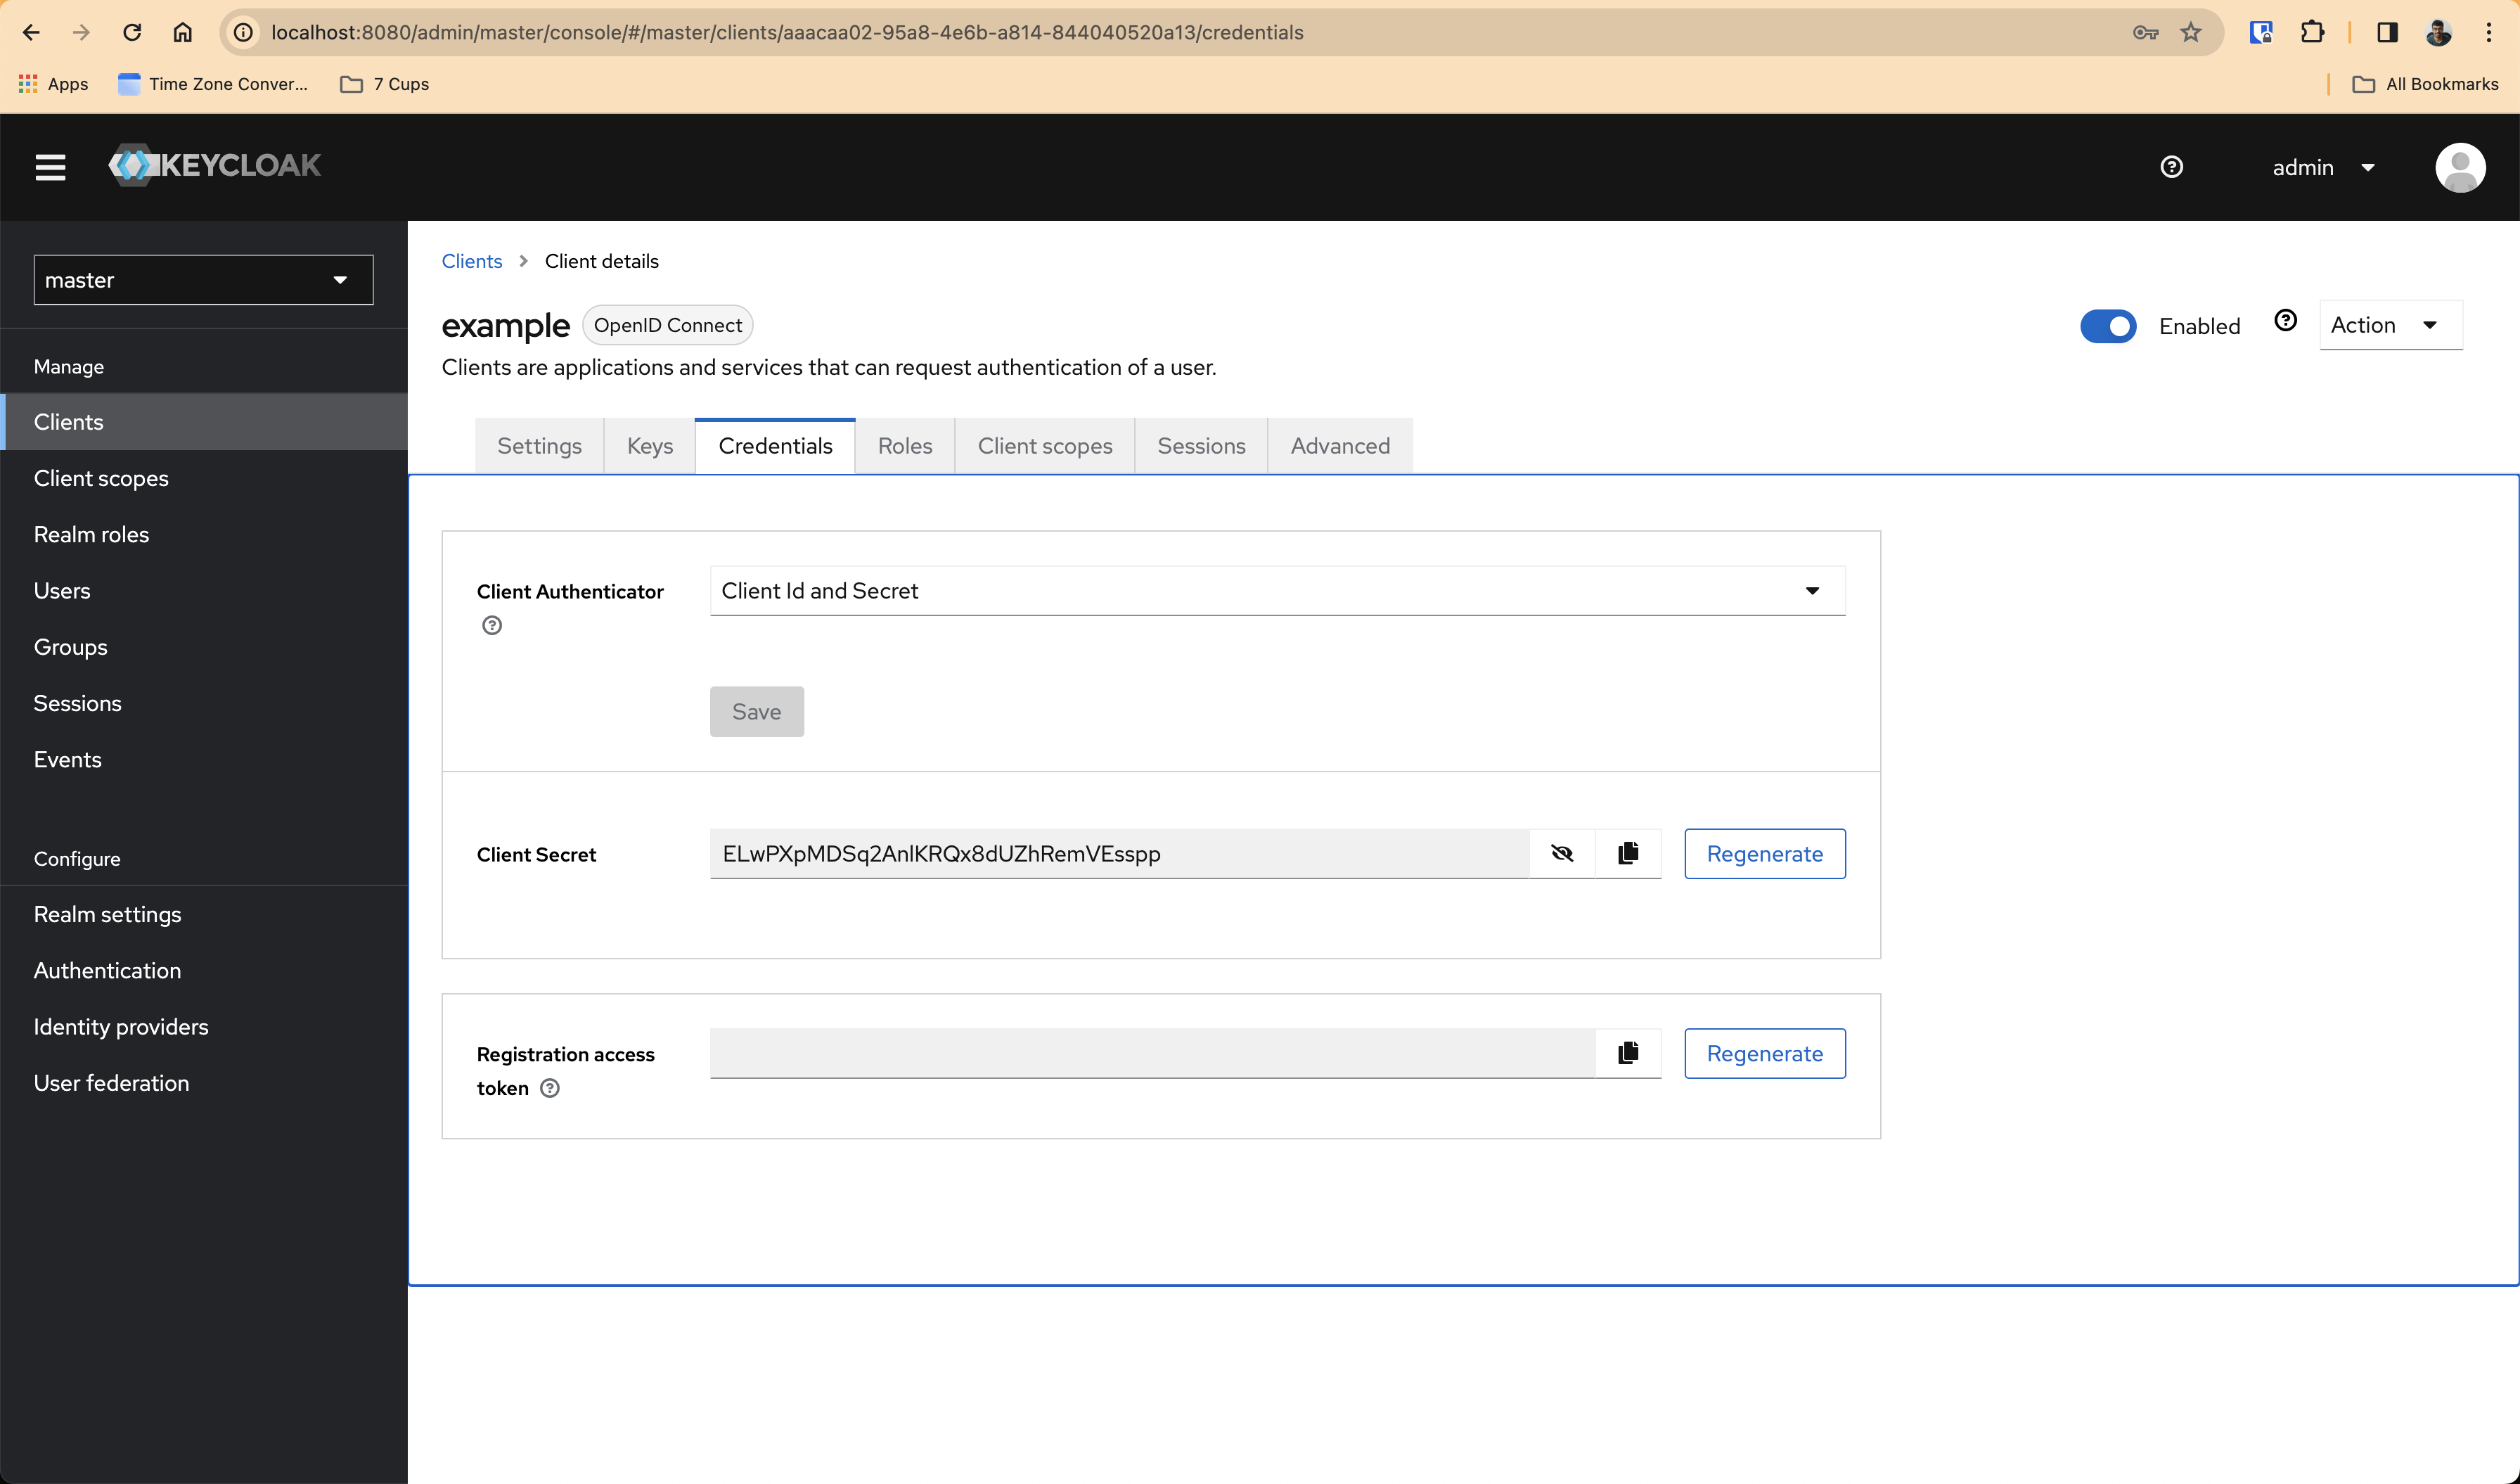
In my case, the client secret is ELwPXpMDSq2AnlKRQx8dUZhRemVEsspp
Now, let's open up our demo application
https://github.com/dexidp/dex/tree/daf1bf256486ada5d7a70f3dbf6bcd7f55622284/examples/example-app
I cloned the dex repository and built the example-app using make examples . Note that this requires Golang to be installed. It will look like this -
$ make examples
github.com/dexidp/dex/examples/example-app
Finally, you can run the example-app like this -
$ ./bin/example-app --help
An example OpenID Connect client

Usage:
  example-app [flags]

Flags:
      --client-id string        OAuth2 client ID of this application. (default "example-app")
      --client-secret string    OAuth2 client secret of this application. (default "ZXhhbXBsZS1hcHAtc2VjcmV0")
      --debug                   Print all request and responses from the OpenID Connect issuer.
  -h, --help                    help for example-app
      --issuer string           URL of the OpenID Connect issuer. (default "http://127.0.0.1:5556/dex")
      --issuer-root-ca string   Root certificate authorities for the issuer. Defaults to host certs.
      --listen string           HTTP(S) address to listen at. (default "http://127.0.0.1:5555")
      --redirect-uri string     Callback URL for OAuth2 responses. (default "http://127.0.0.1:5555/callback")
      --tls-cert string         X509 cert file to present when serving HTTPS.
      --tls-key string          Private key for the HTTPS cert.
That shows the help options when using --help flag. Now, let's run it! :)
We know the client ID and client secret and the issuer too, which I'll share, let's put together all these :)
$ ./bin/example-app --issuer http://localhost:8080/realms/master --client-id example --client-secret 'ELwPXpMDSq2AnlKRQx8dUZhRemVEsspp'
It will look something like this -
$ ./bin/example-app --issuer http://localhost:8080/realms/master --client-id example --client-secret 'ELwPXpMDSq2AnlKRQx8dUZhRemVEsspp'
2024/02/01 20:21:17 listening on http://127.0.0.1:5555
Now, go to http://localhost:5555/ in an incognito window. It will look something like this -
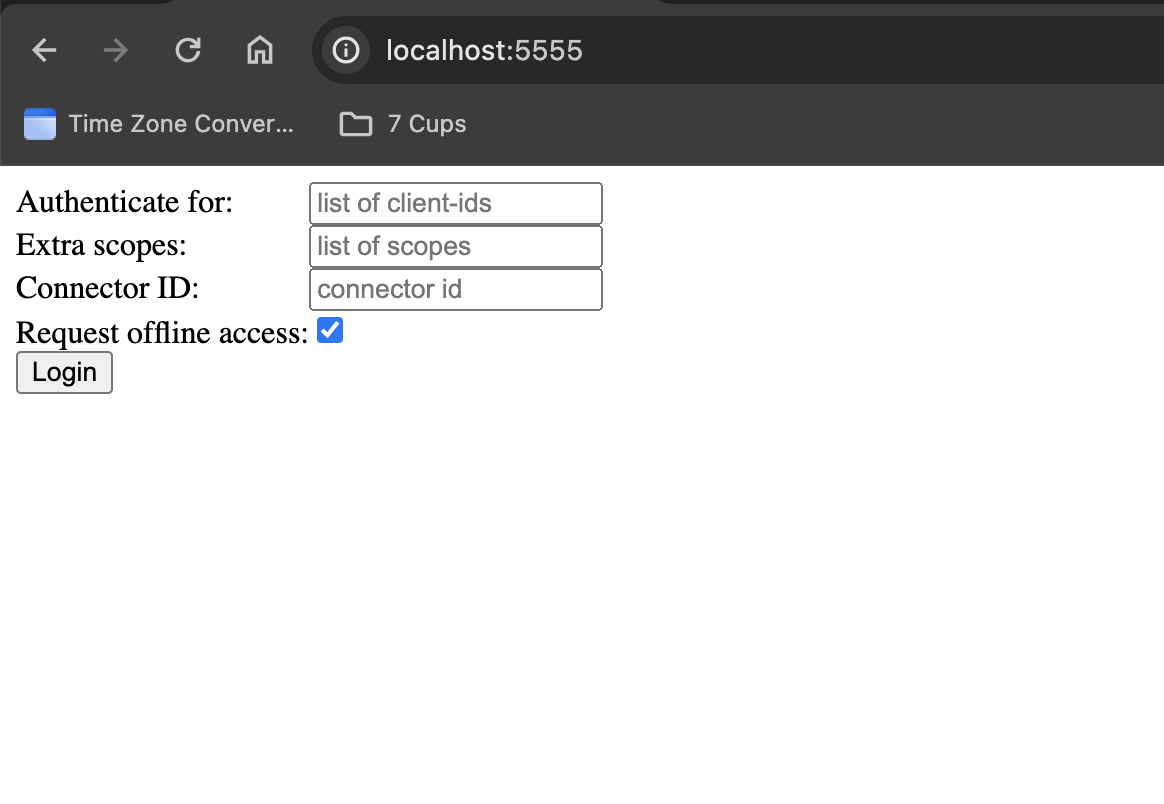
Next, just click Login , and it will go to a page that looks like this -
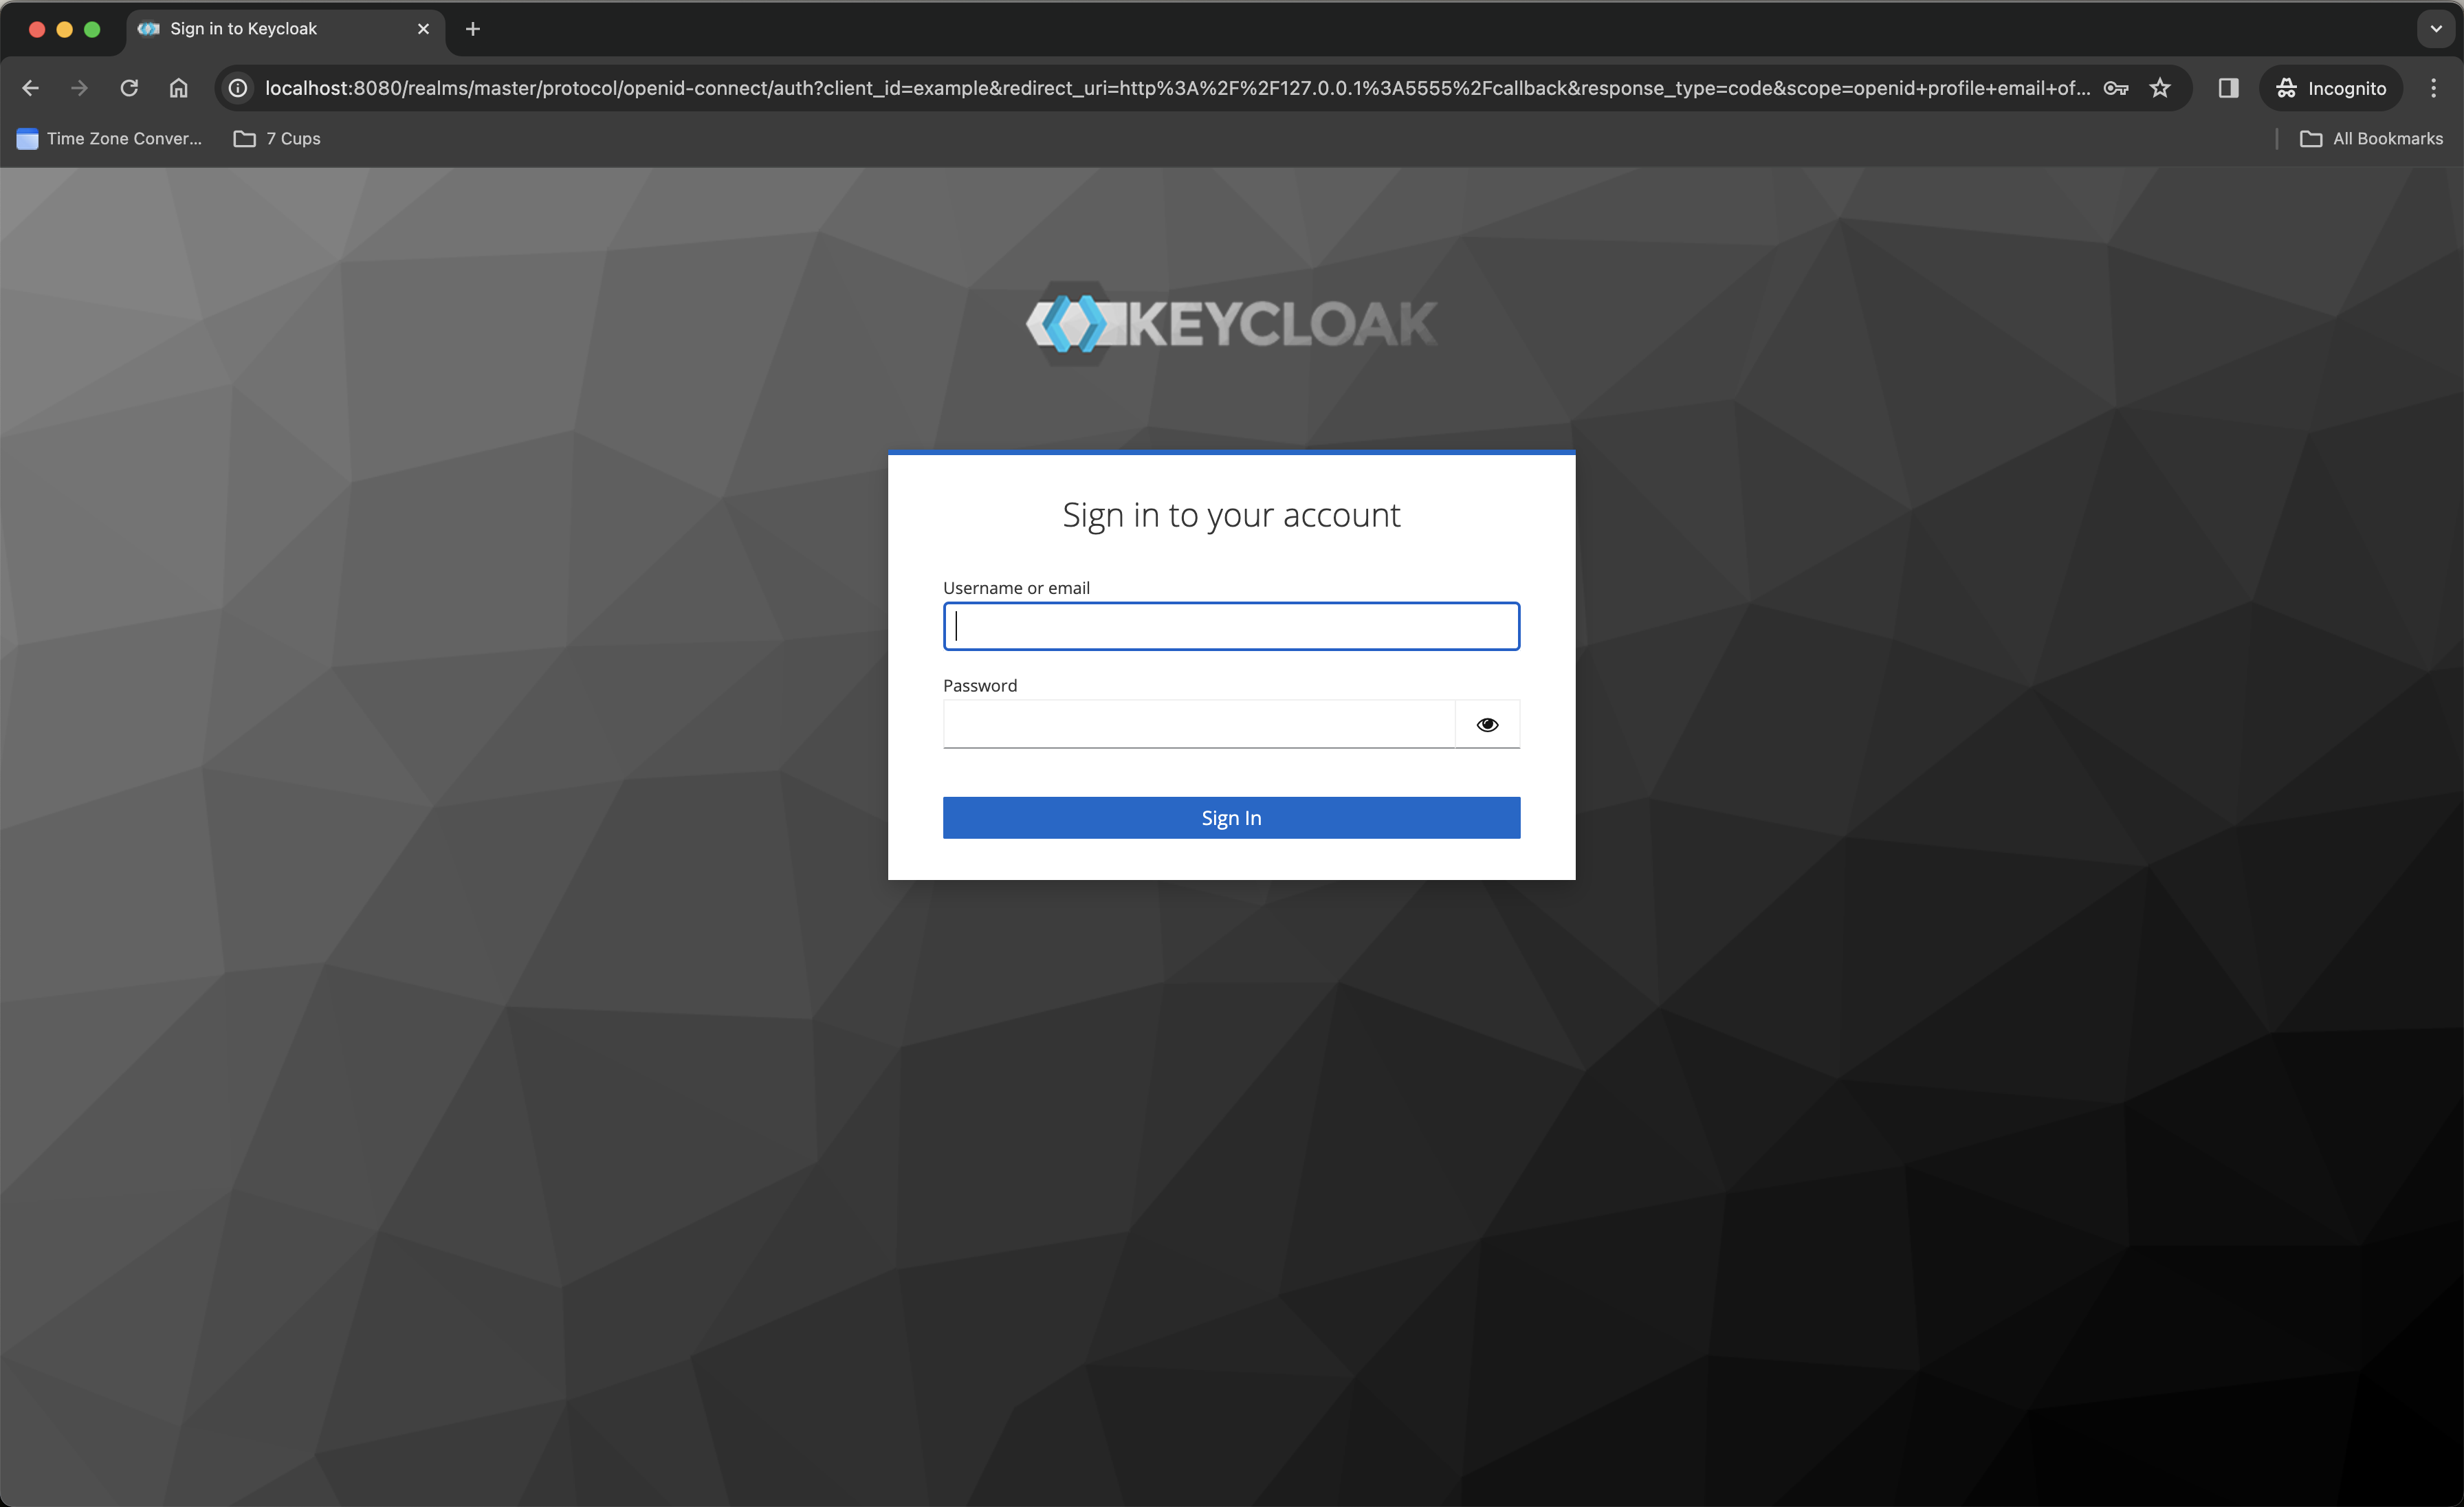
With the URL looking something like this -
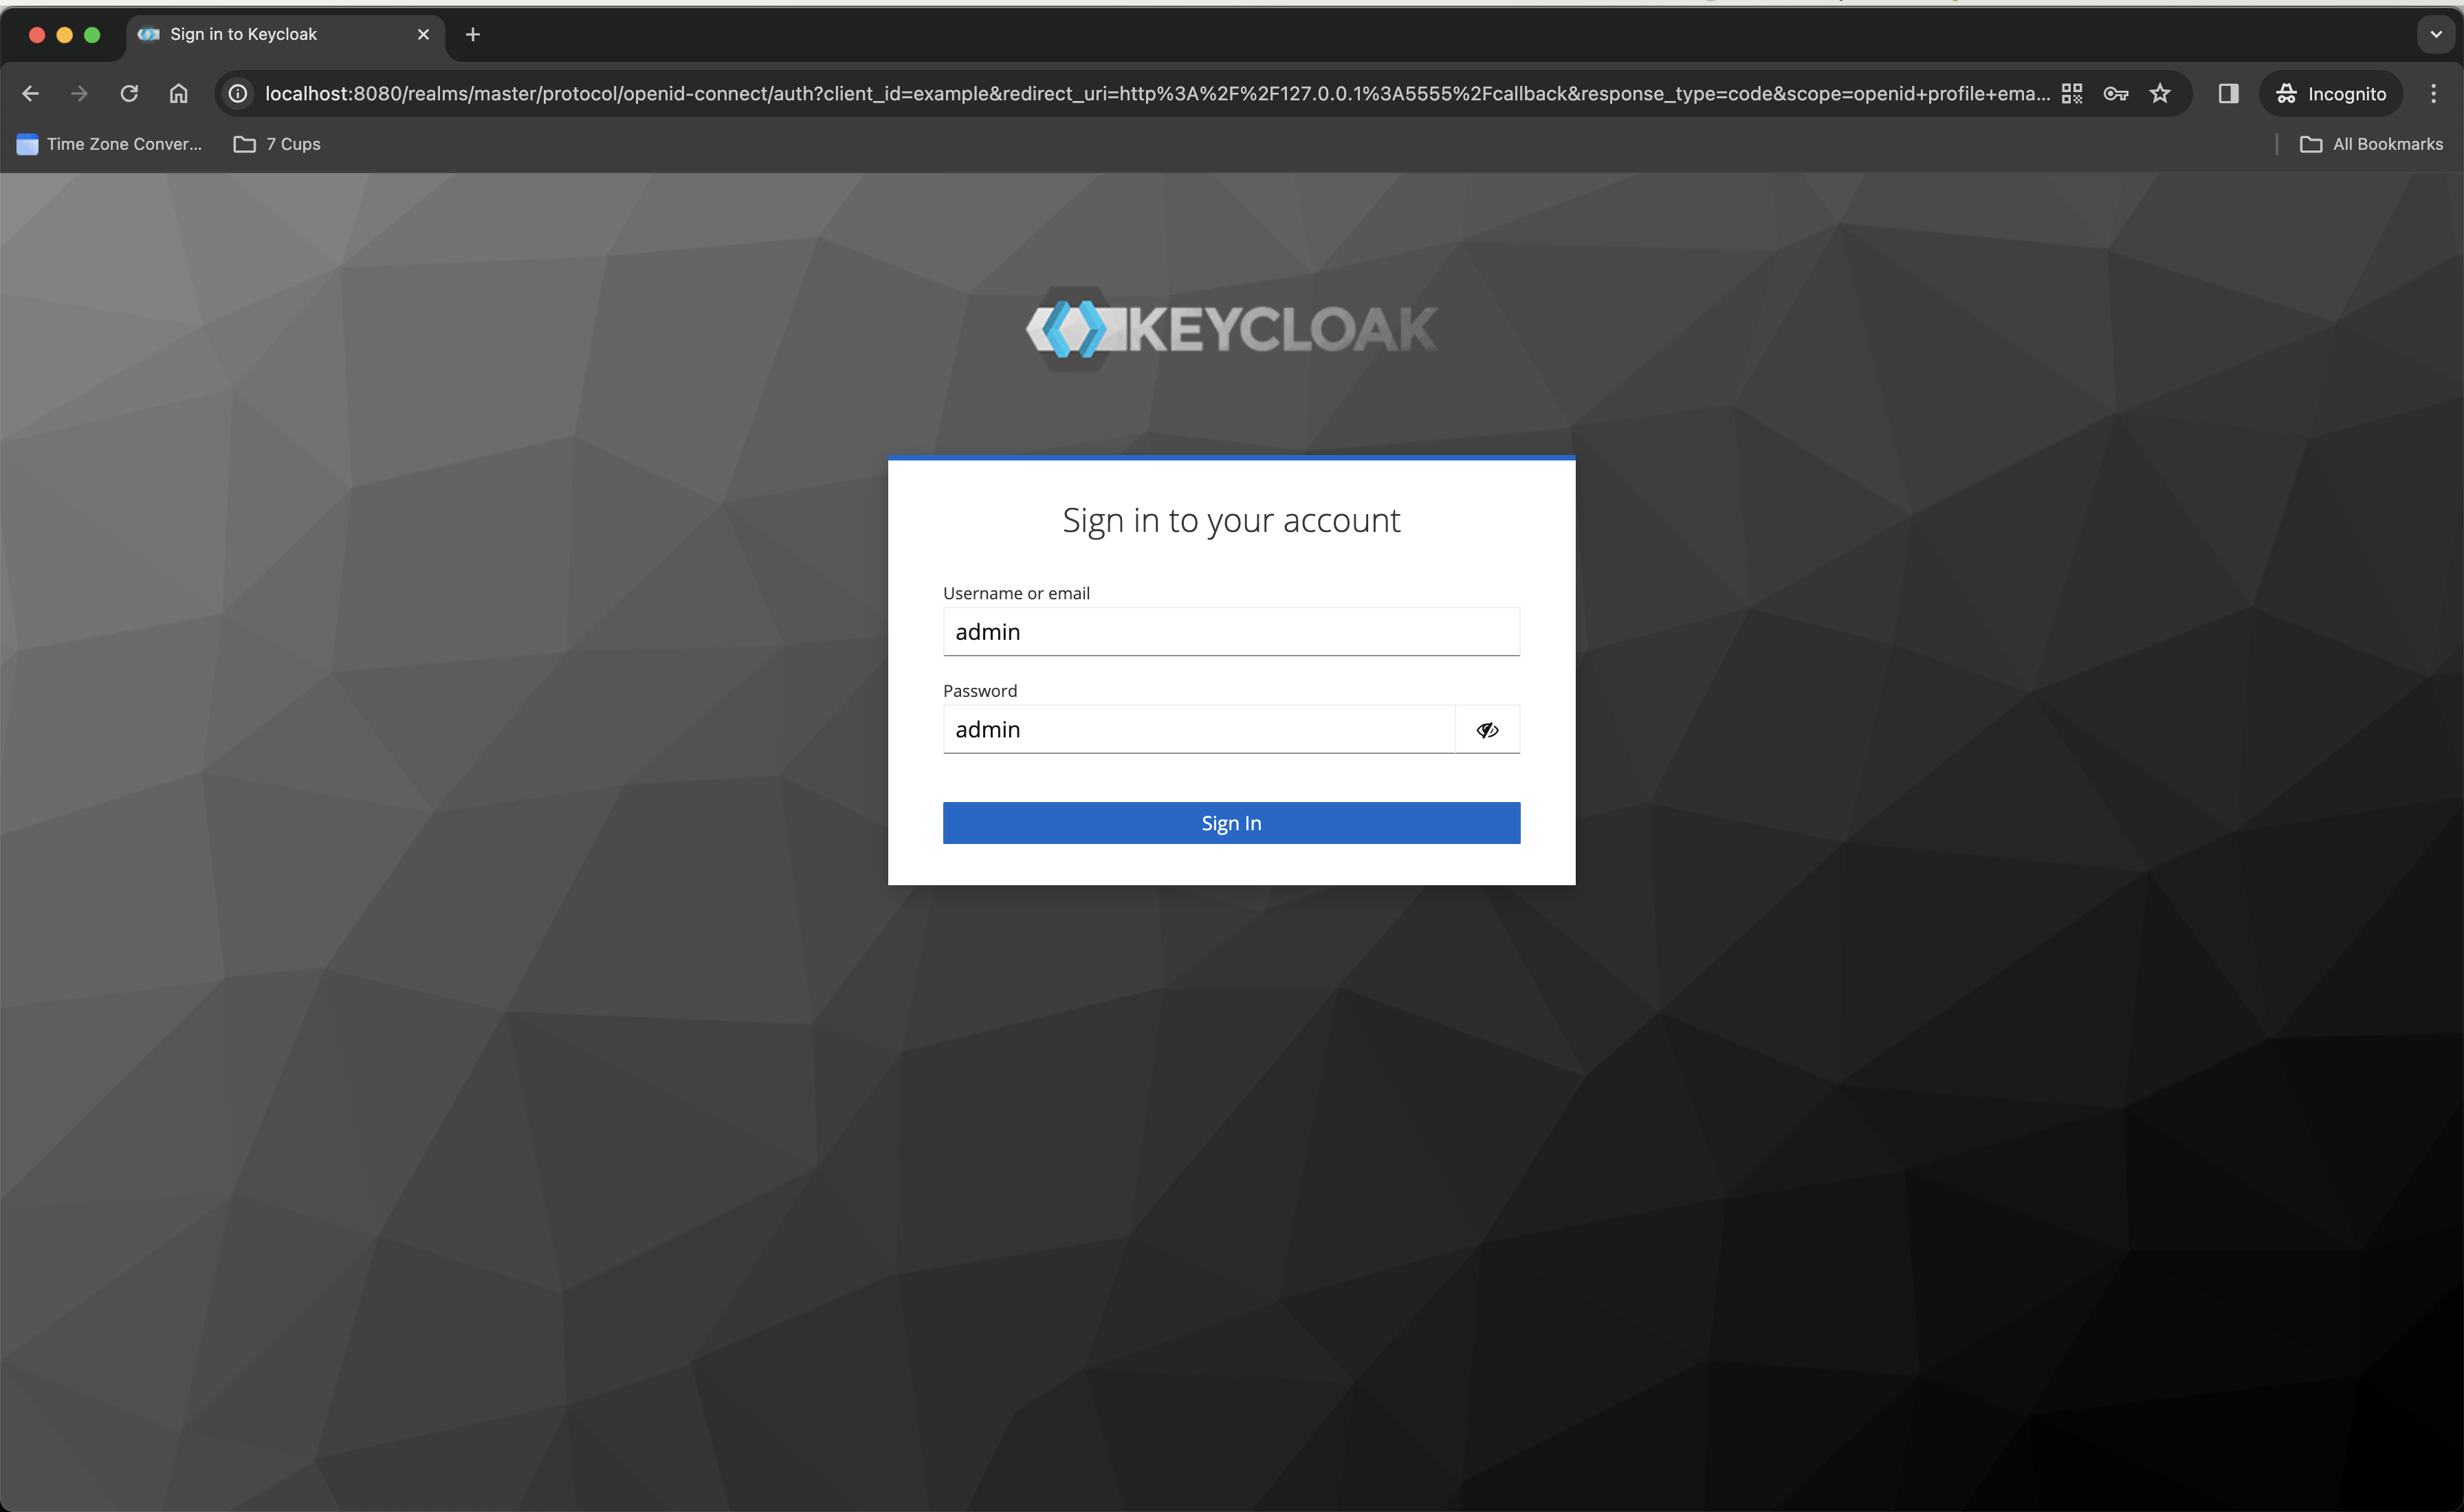
Now, we know only one user that's present in Keycloak, which is the admin user, so, let's use the admin user credentials and login to it - Username: admin and Password: admin
It will look something like this -
Finally, just click Login . Finally, you will see the token you got from the Keycloak OpenID Connect Provider. It will look something like this -
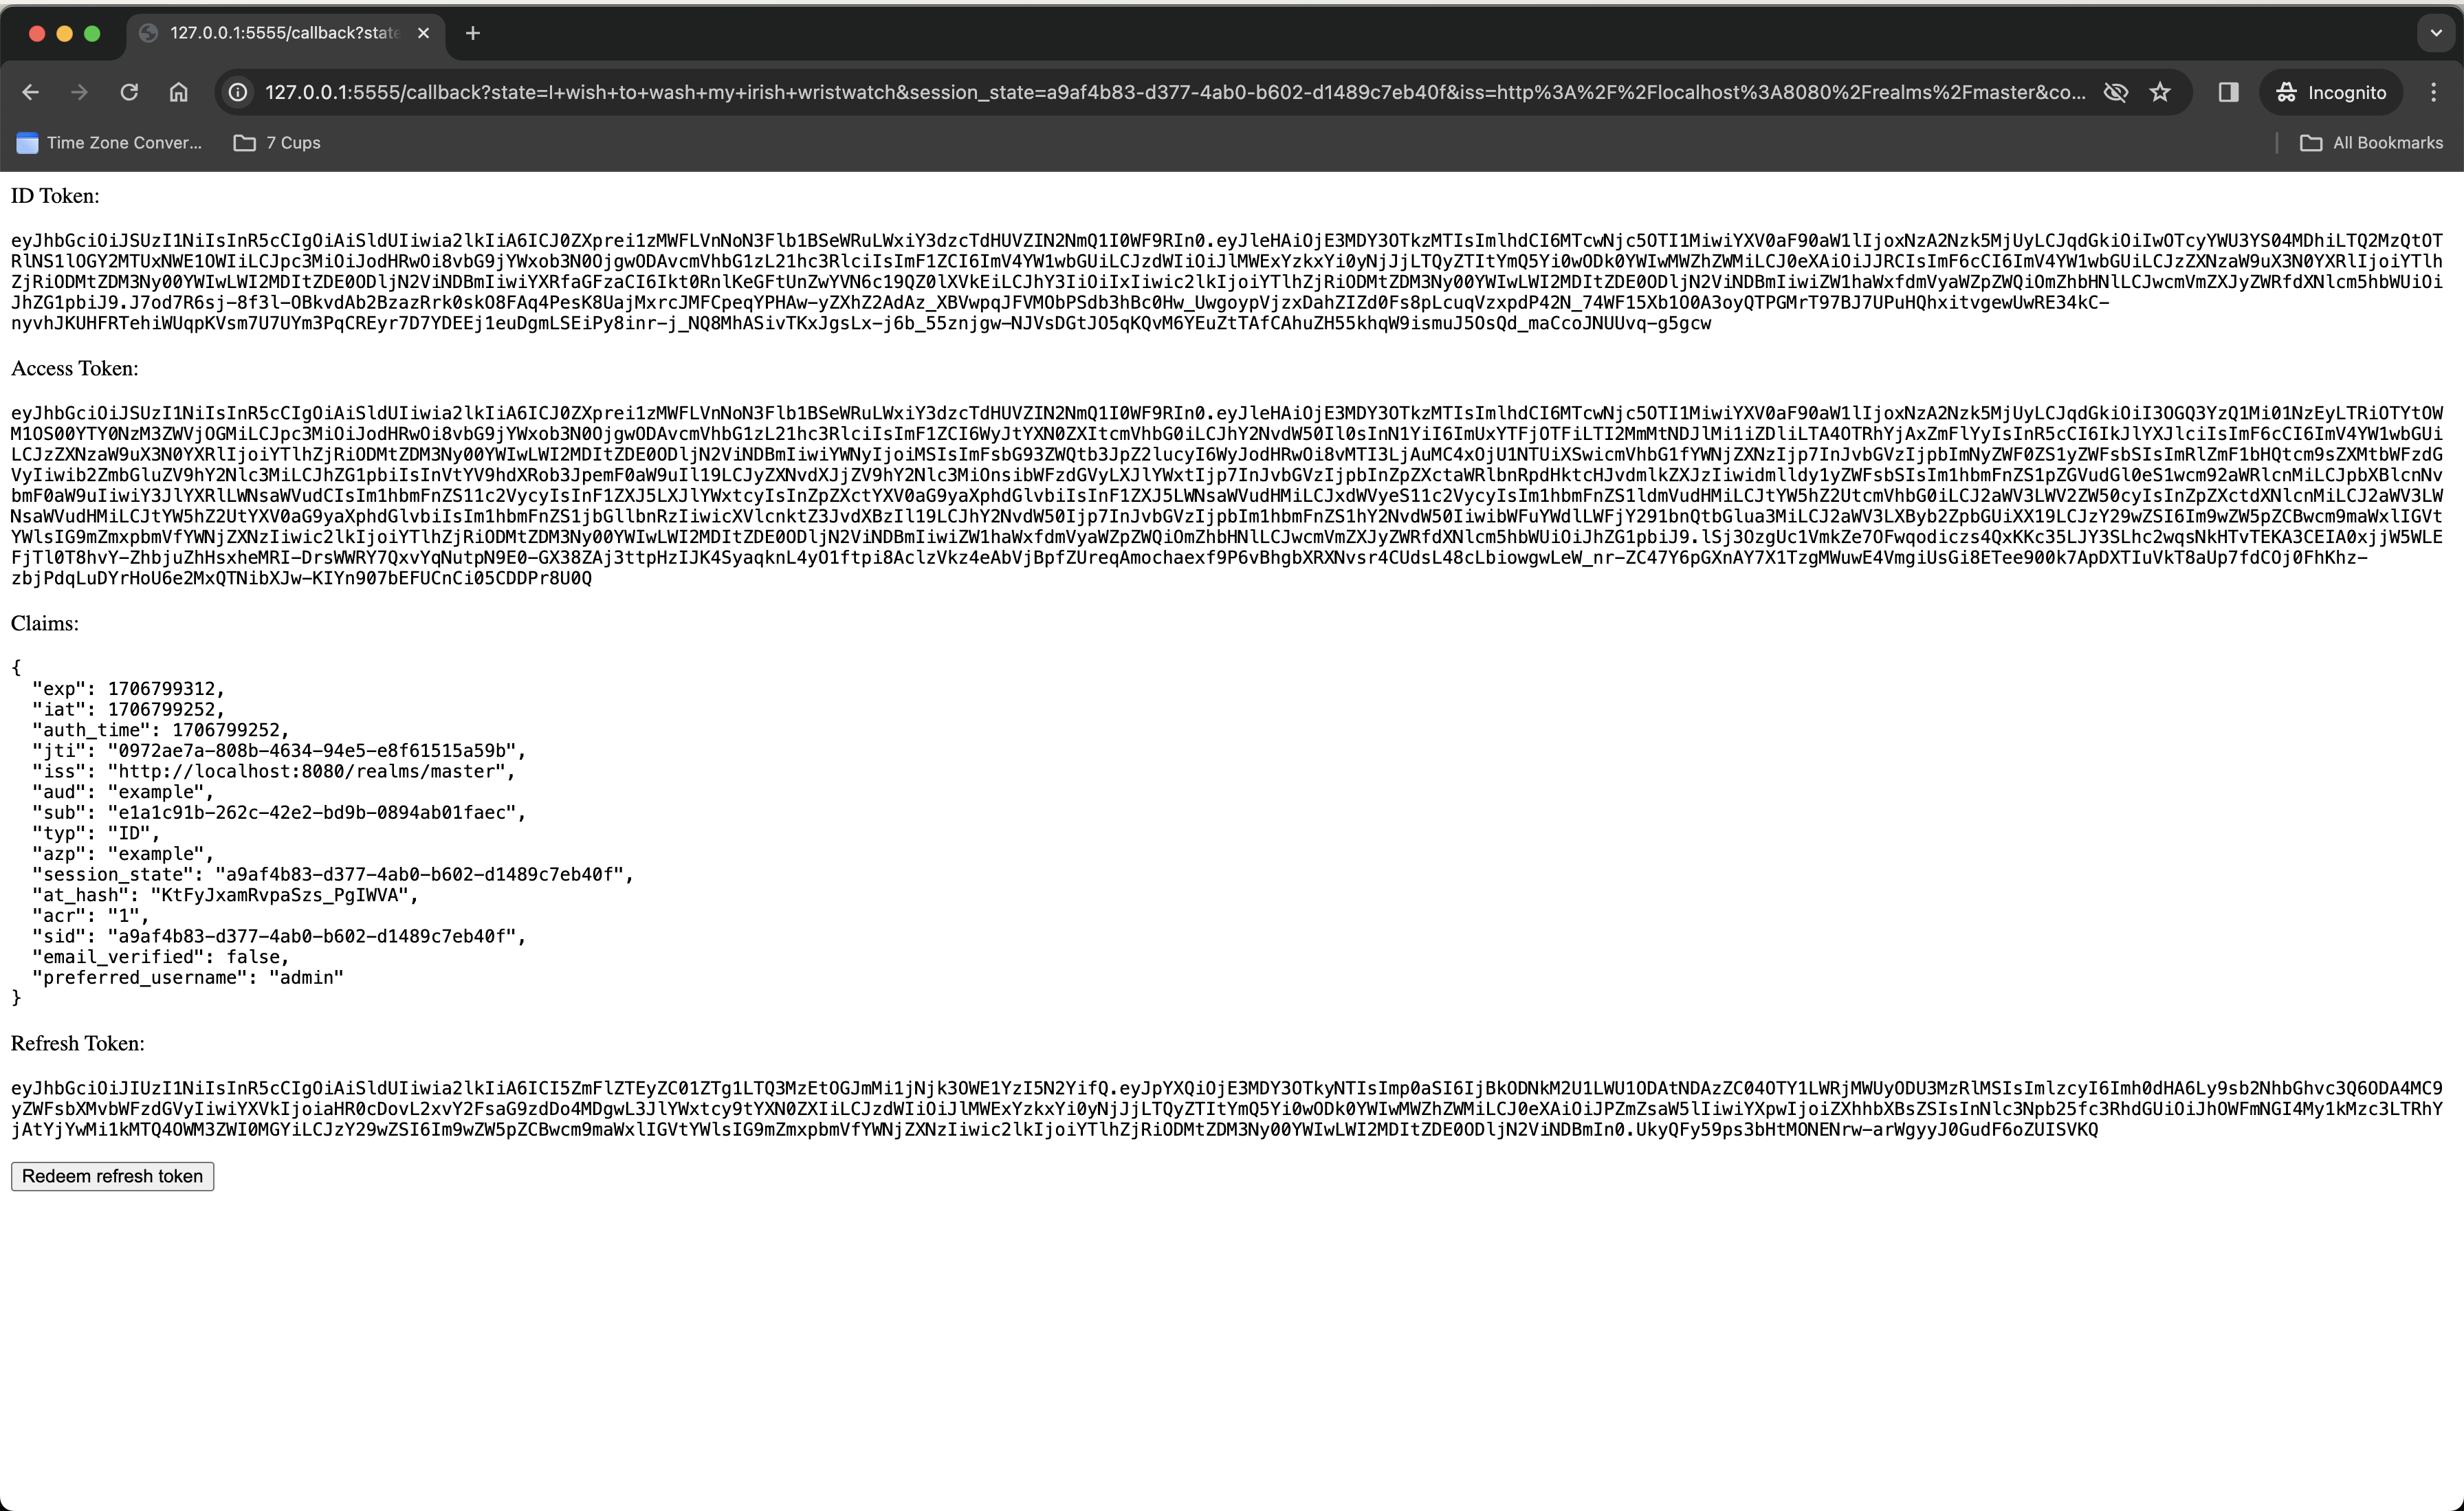
With the URL looking something like this -
You can also click Redeem refresh token and it will show you a new 🆕 token for ID token, Access token and Refresh token too :)
If you refresh this page, it will show an error, which makes sense. It will look like this -
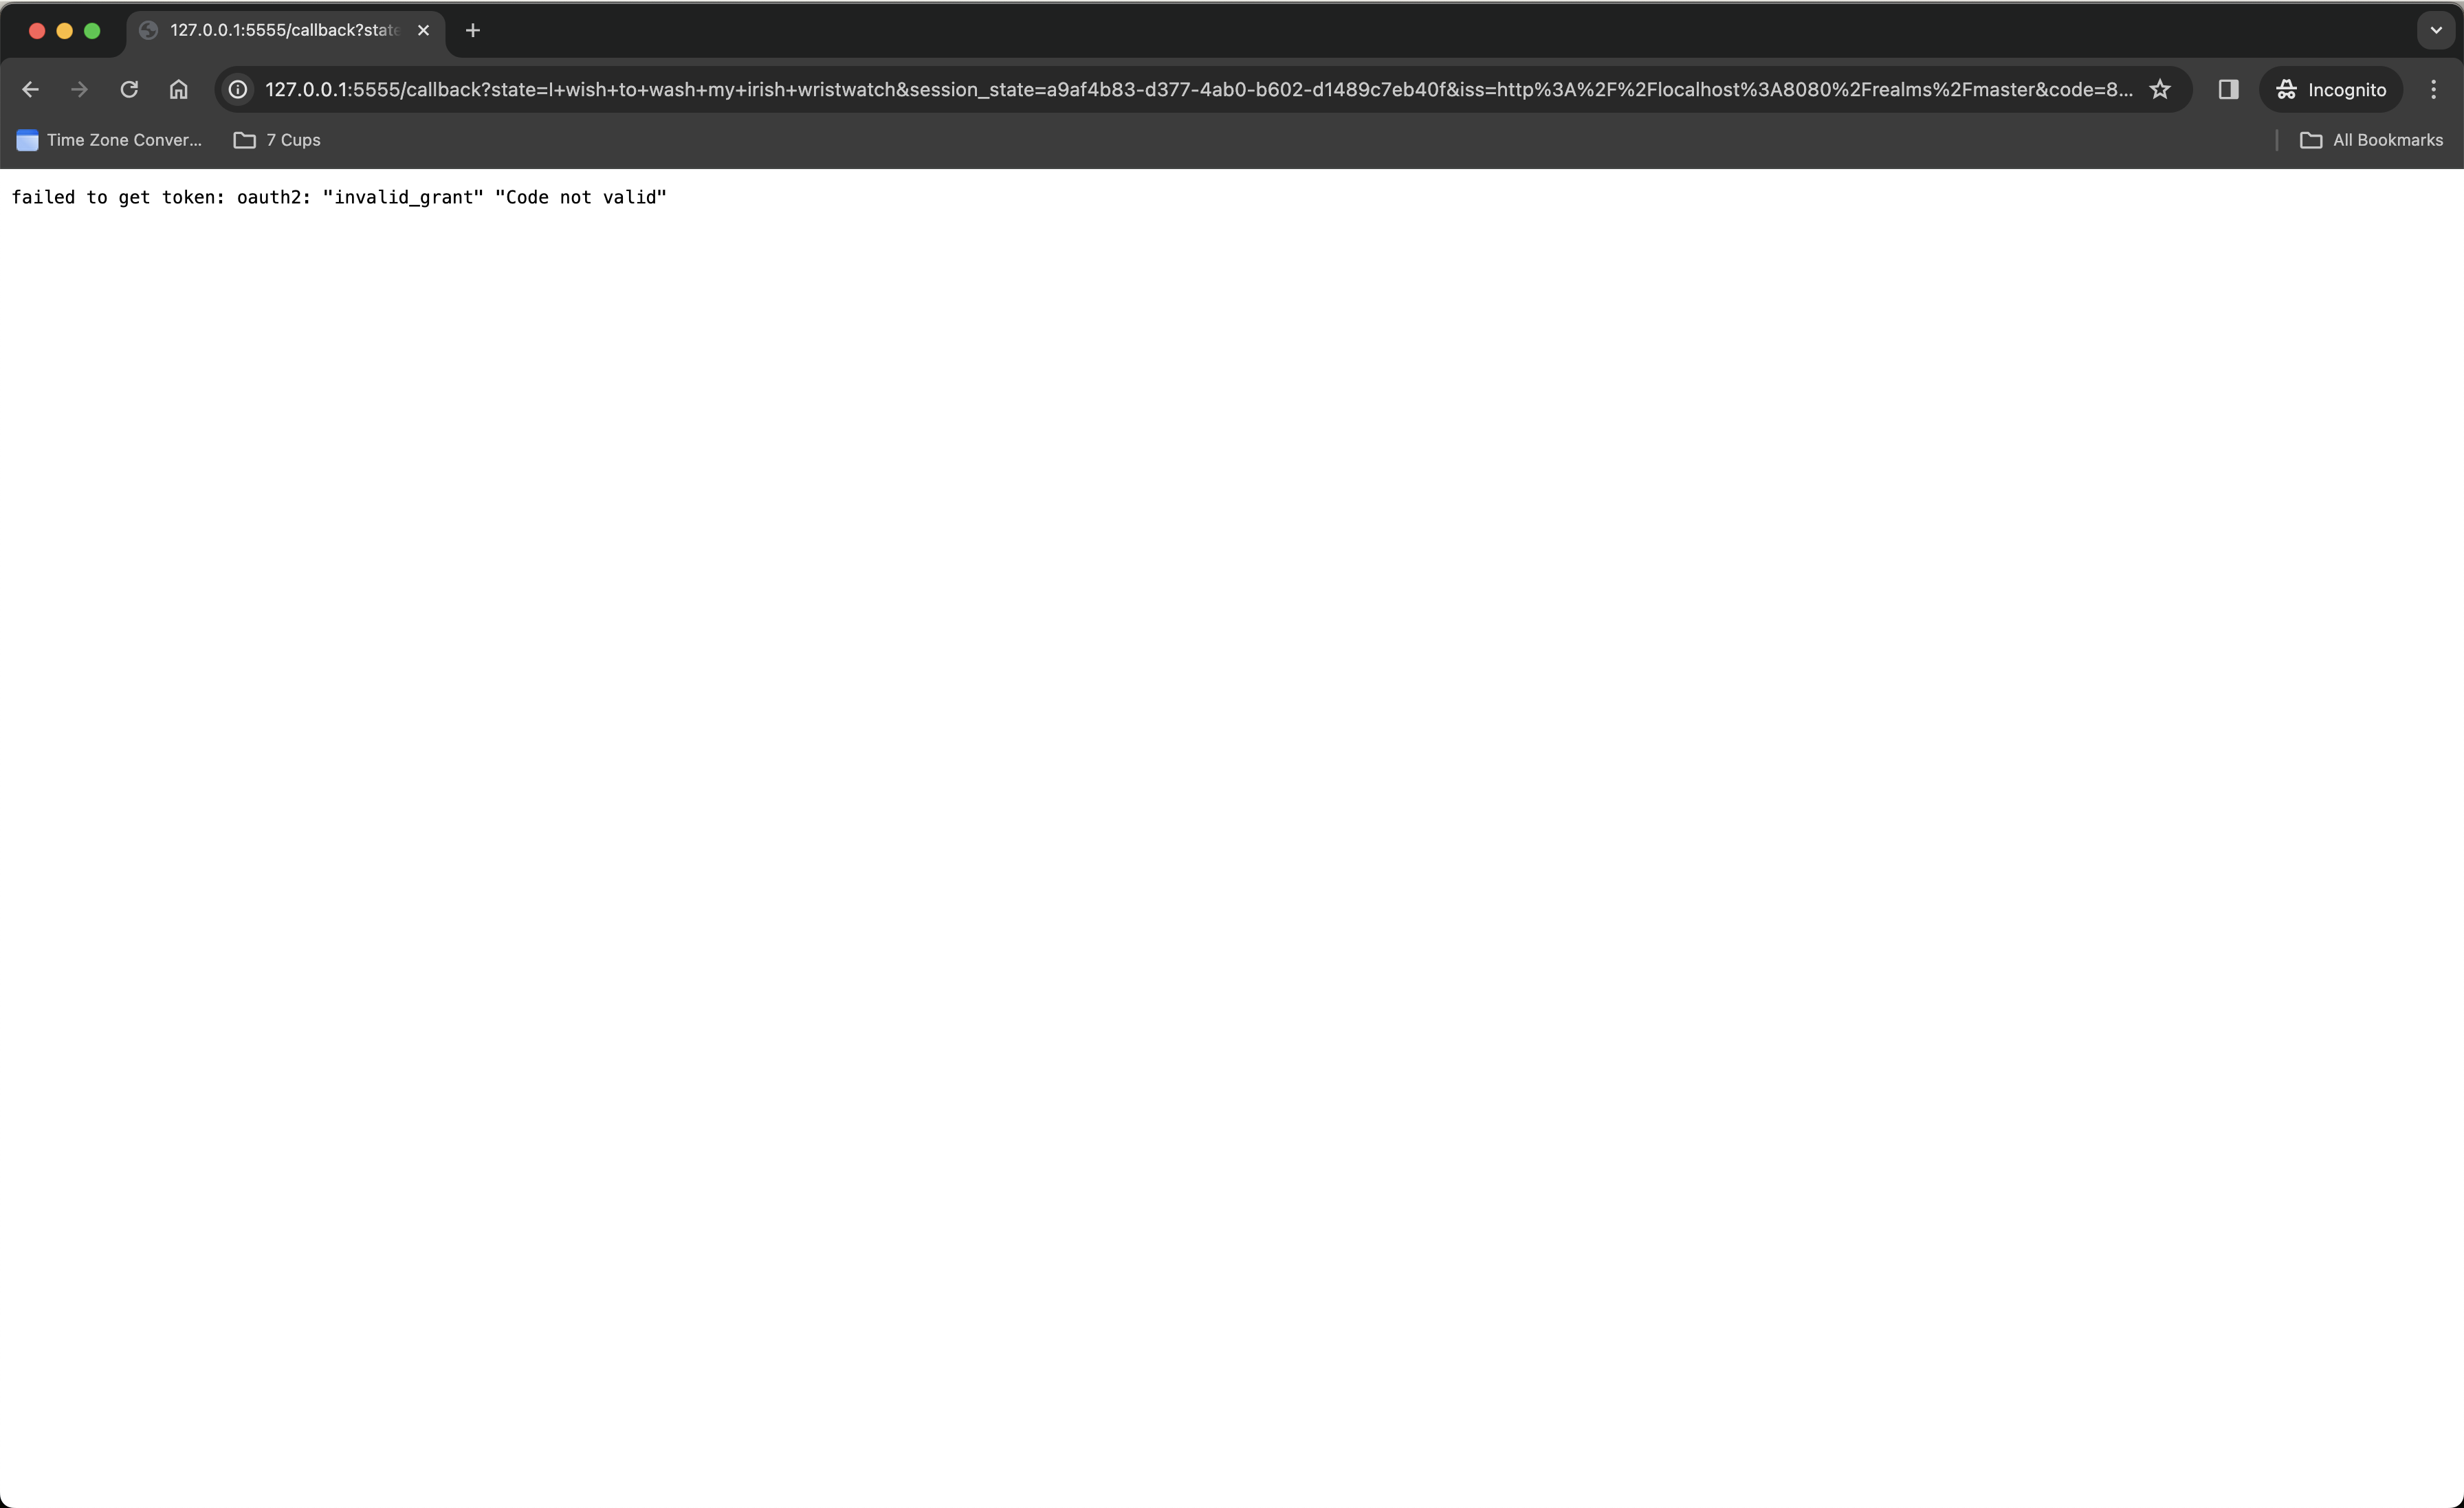
As it correctly says, the code is not valid anymore
You can refresh the page once the Redeem refresh token is clicked though. I'll probably write another post talking about the internals of this whole flow and why it works in some refresh and why and how it doesn't work in other refresh :)
So, that's how you do a basic authentication using OpenID Connect using Keycloak :) 🔑 🔐
That's all for this blog post. I'll see you in the next one :D :)